Have you ever wanted to make your own scary audio? With Audacity, it’s easier than you might think. In this blog post, let’s go over the 5 easy steps to make your voice sound like a demon using Audacity, a free and open-source audio editing software.
Step 1: Create Multiple Tracks
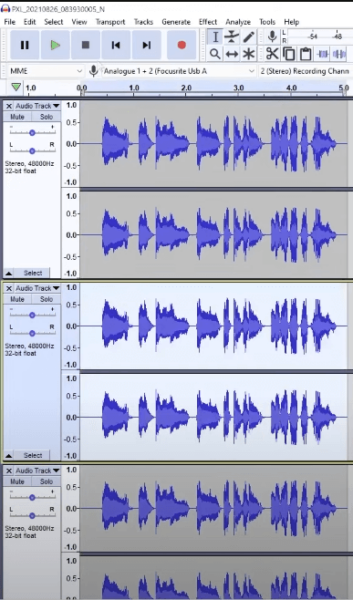
After you uploaded your recording to your timeline, create 2 more tracks and duplicate the original audio. To do this, go to Tracks > Add New > Stereo Track. Do this twice.
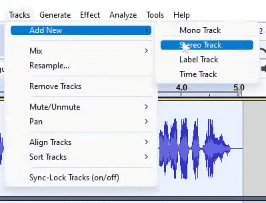
Now, to duplicate the original track, just select the clip and copy and paste it to the newly created tracks. Make sure that the duplicates are in sync with the original audio.
Step 2: Lower the Pitch
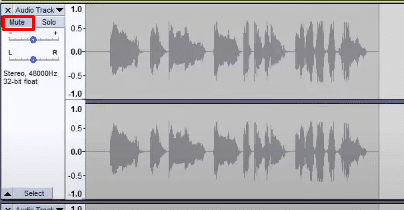
The next step is to work on the first audio track. Make sure to mute the other two tracks by hitting the “Mute” button on the left side of the tracks.
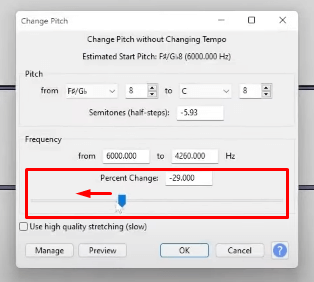
To manipulate the pitch of the audio, select the clip and then go to Effects > Change Pitch. And then on the Change Pitch window, decrease the “Percent Change”.
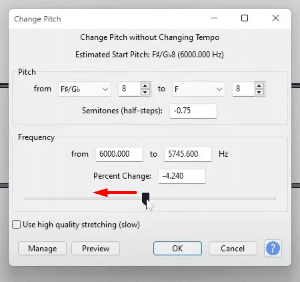
Make sure to listen to the recording by hitting the “Preview” button at the bottom of the window. If you are quite happy with the new pitch of the clip, just click the “OK” button to apply the effect. You can tinker it to your desired scary audio effect.
Step 3: Add the Phaser Effect
To make our recording sound more spooky, we can add the Phaser effect. To do this, go to Effect > Phaser. And then on the Phaser window, press Manage > Factory Presets > Default.
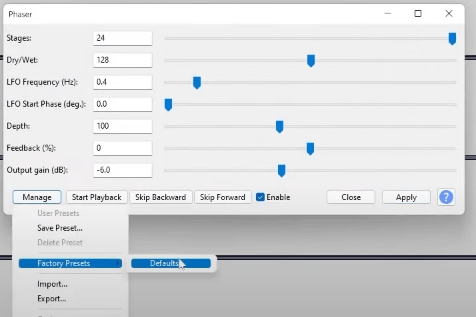
There are a few controls you can manipulate inside the Phaser window. You can play with those to achieve the spookiness you want for your recording. As for my recommendation, it would be best to increase the LFO Frequency, Depth, Feedback, and Output gain.
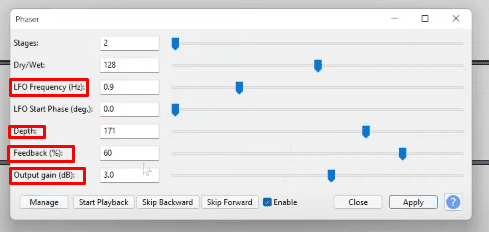
Again, before you click the “Apply” button, make sure to listen to the audio by hitting the “Start Playback”.
Step 4: Tweak the Volume
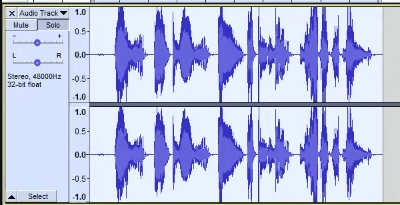
If after lowering the pitch and adding the phaser effect make your recording clip-off like the image below, then you need to lower the volume.
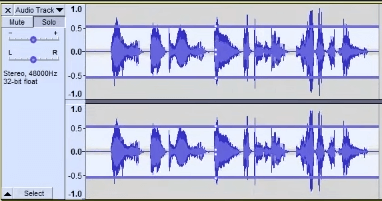
It should look like this after you successfully lowered the volume of the clip.
Step 5: Lower the Pitch of the Other Tracks
The final step to sound like a demon in Audacity is to lower the pitch of the other two tracks. To do this, select the second track and then go to, Effects > Change Pitch. Decrease the “Percent Change” by dragging the control to the left.
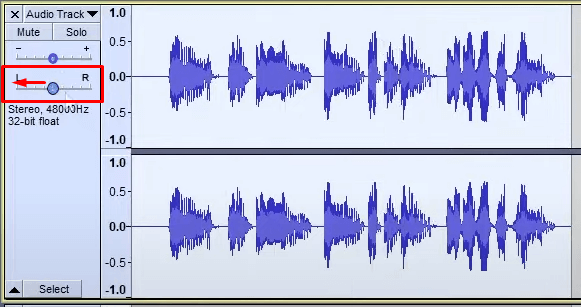
As a final touch, pan the track to the left by dragging the panning control to the left.
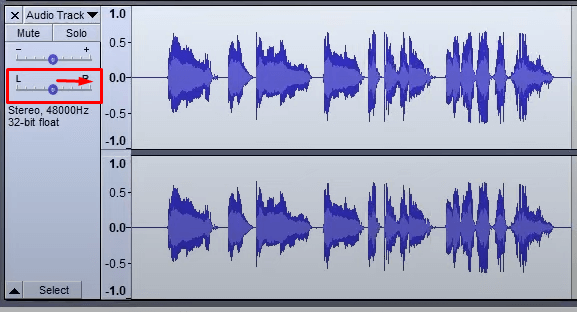
Do the same steps for the third track, however, instead of panning to the left, you should pan it to the right.
And that’s it, you made your voice sound like a demon in 5 easy steps using Audacity. Be sure to export the audio file once you’re satisfied with how your voice sounds.
Final Thoughts
Creating scary audio is very easy to do with Audacity. By just doing five steps — creating multiple tracks, lowering the pitch, adding the phaser effect, tweaking volume, and reducing the other track’s pitches, you can sound like a demon.
If you’re a podcaster, voiceover artist, audio editor, or YouTuber, check out my ultimate Audacity course for beginners. If you are creating an online radio show, podcast, radio imaging, or simply want to make your voice sound better, get hold of my free Audacity presets now.


