Audacity is a free and open-source Digital Audio Workstation (DAW) that has become very popular among content creators, podcasters, audio editors, and musicians. It provides a lot of features and functionality, which makes it an excellent option for anyone who needs to edit and manipulate audio files. In this blog post, I’ll teach you how to splice and crossfade audio easily in Audacity.
What are Splicing and Crossfading?
Before we dive into the process, let us first learn what splicing and crossfading mean in the context of audio editing.
Splicing is the process of literally cutting and separating audio apart to create distinct segments. These segments can then be edited separately. This technique is commonly used to remove unwanted portions, rearrange the order of audio segments, or extract specific parts from a recording.
Crossfading, on the other hand, is a technique used to create a smooth transition between two audio segments. It involves overlapping the ending of one segment with the beginning of another. This process ensures a seamless and natural progression between the two sections.
How to Splice Audio
Step 1: Import Audio Files
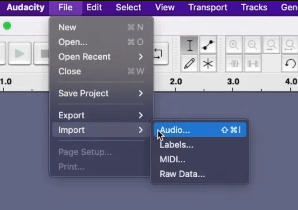
Before anything else, you should import the audio files you want to edit in Audacity. To do this, go to File > Import > Audio or just press Shift+Ctrl/Cmd+I.
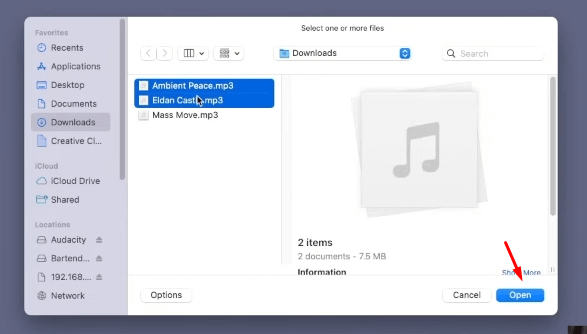
And then on the new window, select the files you want to work on. After that, click on the Open button.
Step 2: Start Splicing the Audio
Now that we have the audio file in our Audacity timeline, it’s time to splice it. First, listen to your recording and determine the specific sections you want to splice. After that, use the Selection Tool (the I-shaped icon in the toolbar), and click the section of the audio you wish to splice. Once selected, press Ctrl/Cmd+I on your keyboard to splice. Or just double-click and then choose Split Clip.
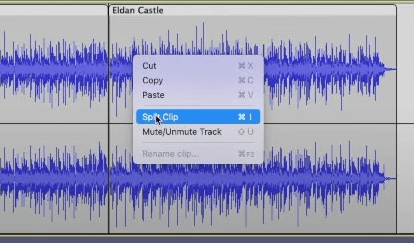
And that’s it! You were able to splice your audio and you can now edit the two audio segments separately.
How to Crossfade Audio
Step 1: Import and Align Tracks
Same as the first step in splicing audio, you will need to import the tracks you want to apply crossfade to. After that, you will have to align the end of one track to the beginning of the other track.
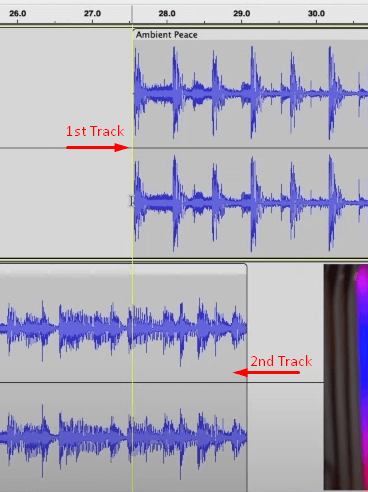
Make sure to properly align the tracks. Zoom in if necessary and adjust the tracks so that they overlap slightly.
Step 2: Apply Crossfade
Once the two tracks are properly aligned, we can now apply the crossfade effect. Start by using the selection tool to click and drag over the region where the two audio segments overlap. Remember to make this region slightly longer than the desired crossfade duration.
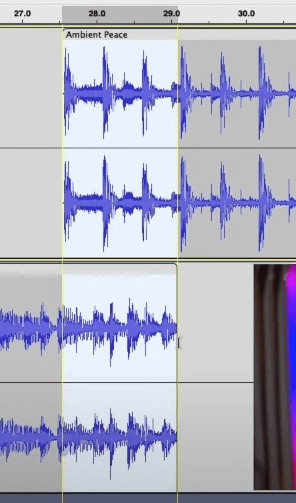
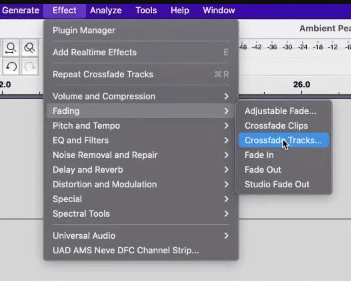
Once selected, go to Effect > Fading > Crossfade Tracks. As you’ll see there are two options for crossfade — Crossfade Clips and Crossfade Tracks. Choose the former if the two clips are on the same track but if they are on two separate tracks, select the latter.
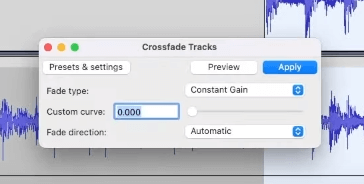
Finally, on the Crossfade Tracks window, manipulate the settings to your liking. Usually, the default setting is good enough. So if you are new to using this feature, just leave it to default. Click the Apply button to save the effect.
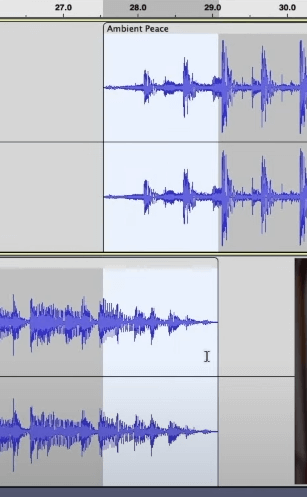
The image below shows the result after successfully applying crossfade to the tracks.
Final Thoughts
Splicing and crossfading audio are two features in Audacity that can greatly enhance your recordings. By following the steps above, you’ll be able to easily splice and crossfade audio tracks. Remember to experiment and have fun as you use these Audacity’s amazing features.


