Something I get asked quite a lot is how to create the vintage voice effect in Audacity. I’ve previously done a tutorial on this for Adobe Audition, but this time we’re focusing on the free Audacity software.
Getting Started
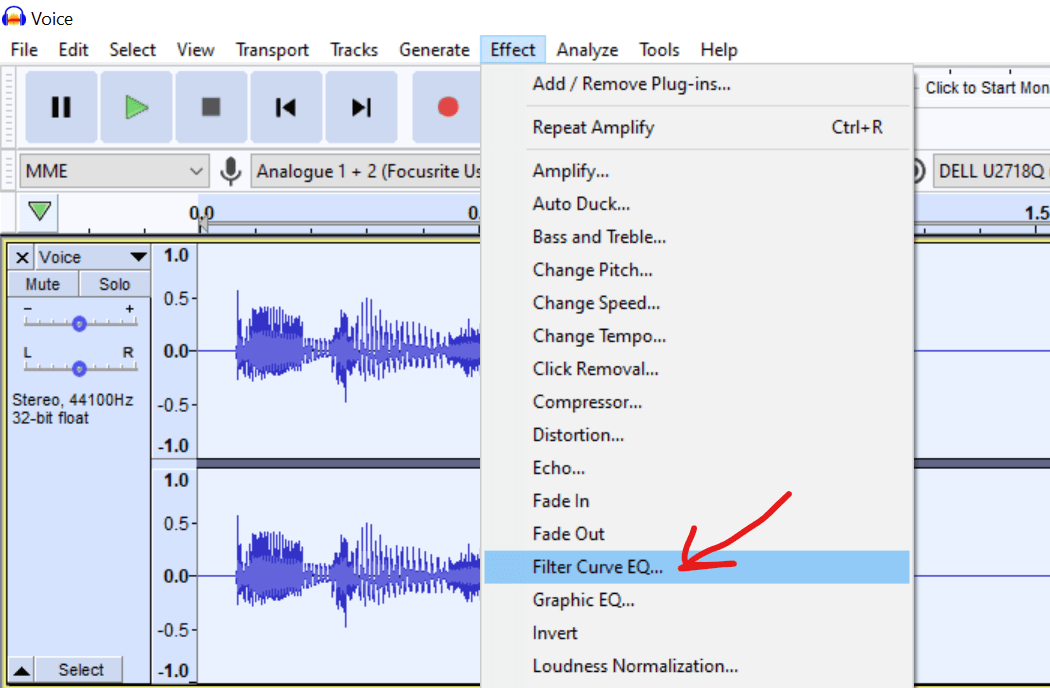
Once you’ve either recorded your audio in Audacity or dropped a track into Audacity, select the whole track by pressing CRTL+A or CMD+A, then go to Effect in the top menu and select Filter Curve EQ, and what comes up is something that looks a little like the FFT filter.
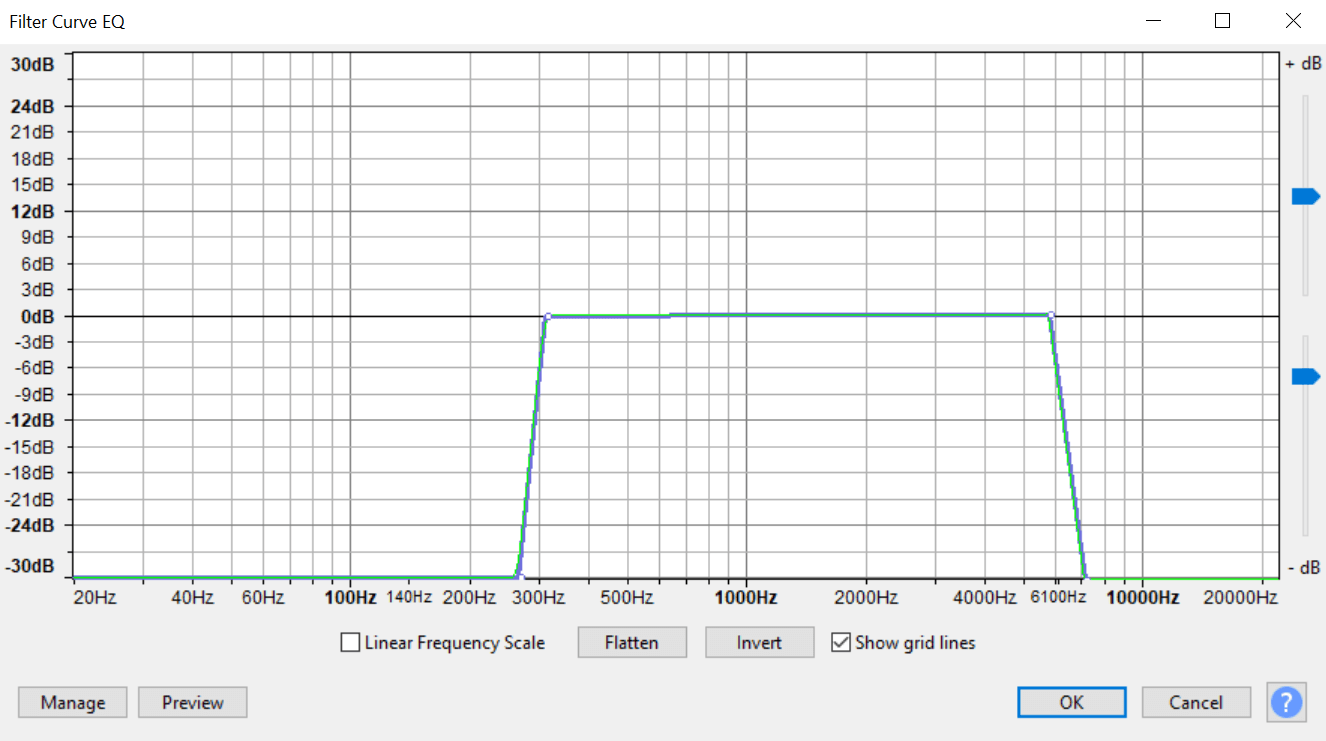
We can raise this audio, but what we really want to do is retain the audio, so let’s roll off anything below 300Hz and above 7,000Hz by dragging the line right down to the bottom at those two points.
Click preview and you’ll hear that it’s already starting to sound rather different. You can play around a bit more now, sweeping up for a bit more effect or even adding some distortion by adding some ups and downs at the high end (see screenshot below).
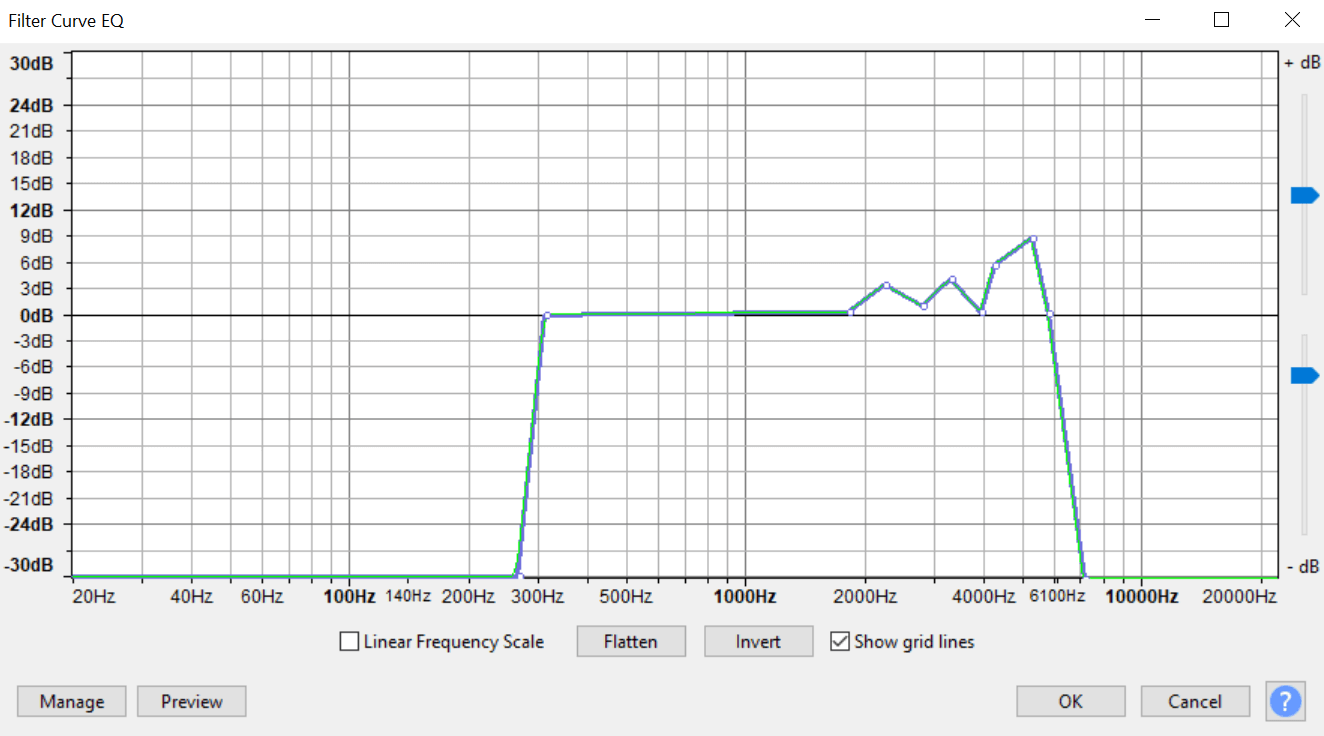
Then, simply click OK and you’ve got a basic vintage voiceover!
Additional Effects
But there’s so much more you can do to your new track. Once again, select your whole track, and go to Effect > Compressor in the top menu.
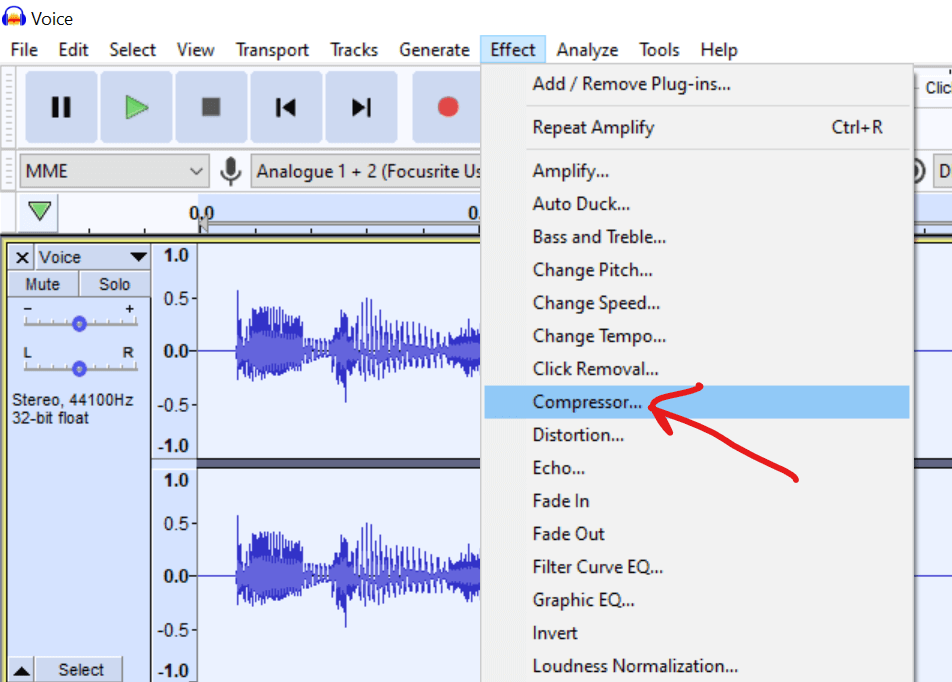
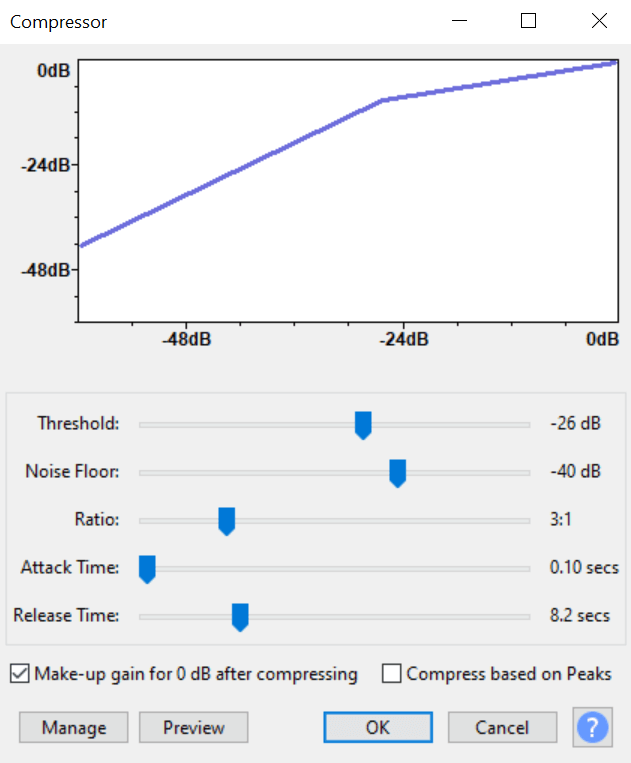
Here, we can make the Threshold quite high at something like -26dB, Noise Floor around -40dB, Ratio around 3:1, Attack Time really short at something like 0.10, and Release Time at about 8.2 secs. Click preview to listen back and click OK once you’re happy with how it sounds.
Introducing Third-Party Plugin
To add even more effects, there’s a great third-party plug-in you can use. It’s from iZotope, and, like Audacity, it’s completely free – I thought I’d give you the whole vintage voice creator’s kit here! Head over here to download it.
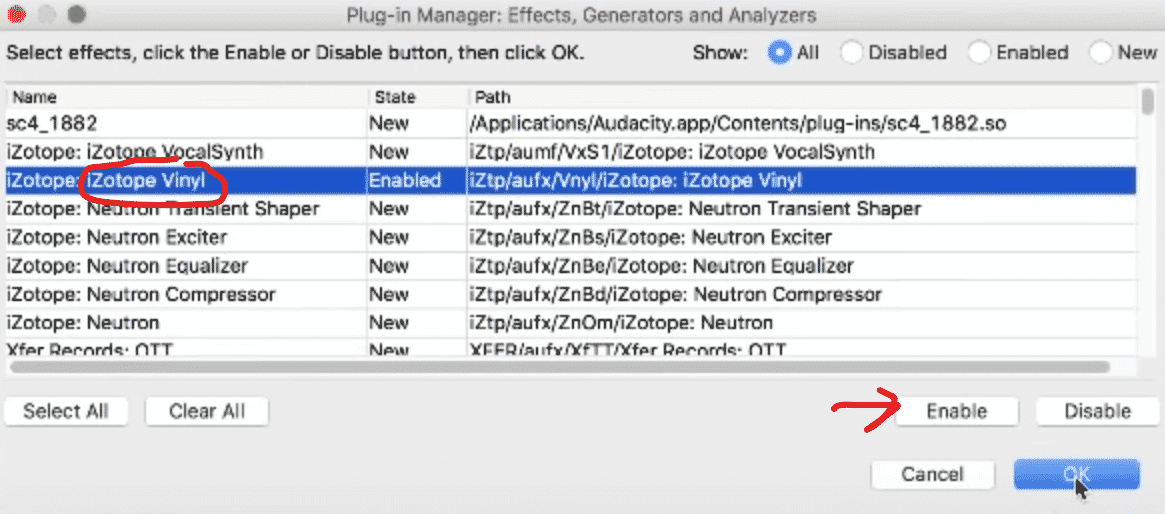
To install it, once you’ve run the installer from iZotope, go to Effect > Add/Remove Plug-ins…, find the plug-in, and click Enable, then OK, and your new plug-in should appear in the top menu under Effect.
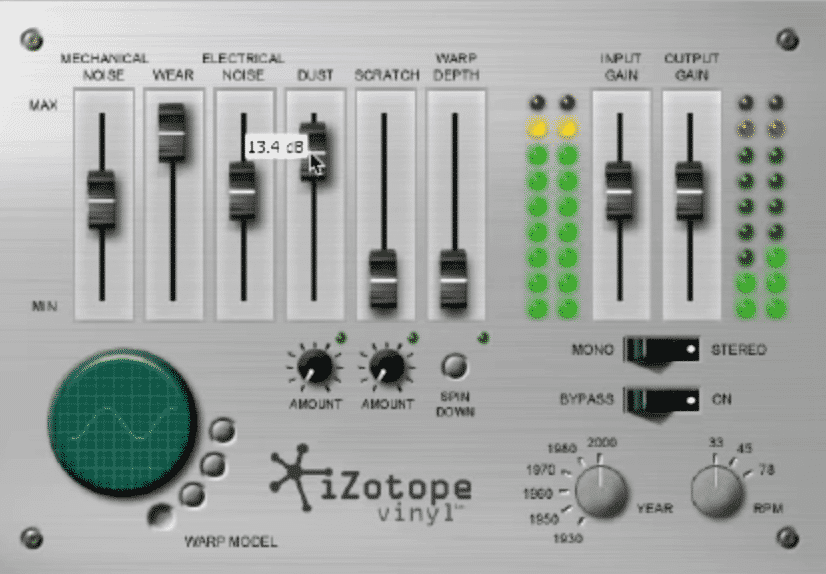
What this plugin does, is add all kinds of great old-style vinyl effects, like mechanical noise, wear, and electrical noise – basically generating a really nice vinyl effect!
You can play around with the levels in real time while you preview your track. Note that when you bring the dust in, you have to select how much you’d like, e.g. 50%.
You can even apply warp and spin down effects, HOWEVER, Audacity really didn’t like it when I tried to apply the spin down effect (see the screenshot below), so take care and perhaps avoid that one! You can always open Audition and add the spin down there using the same plug-in.
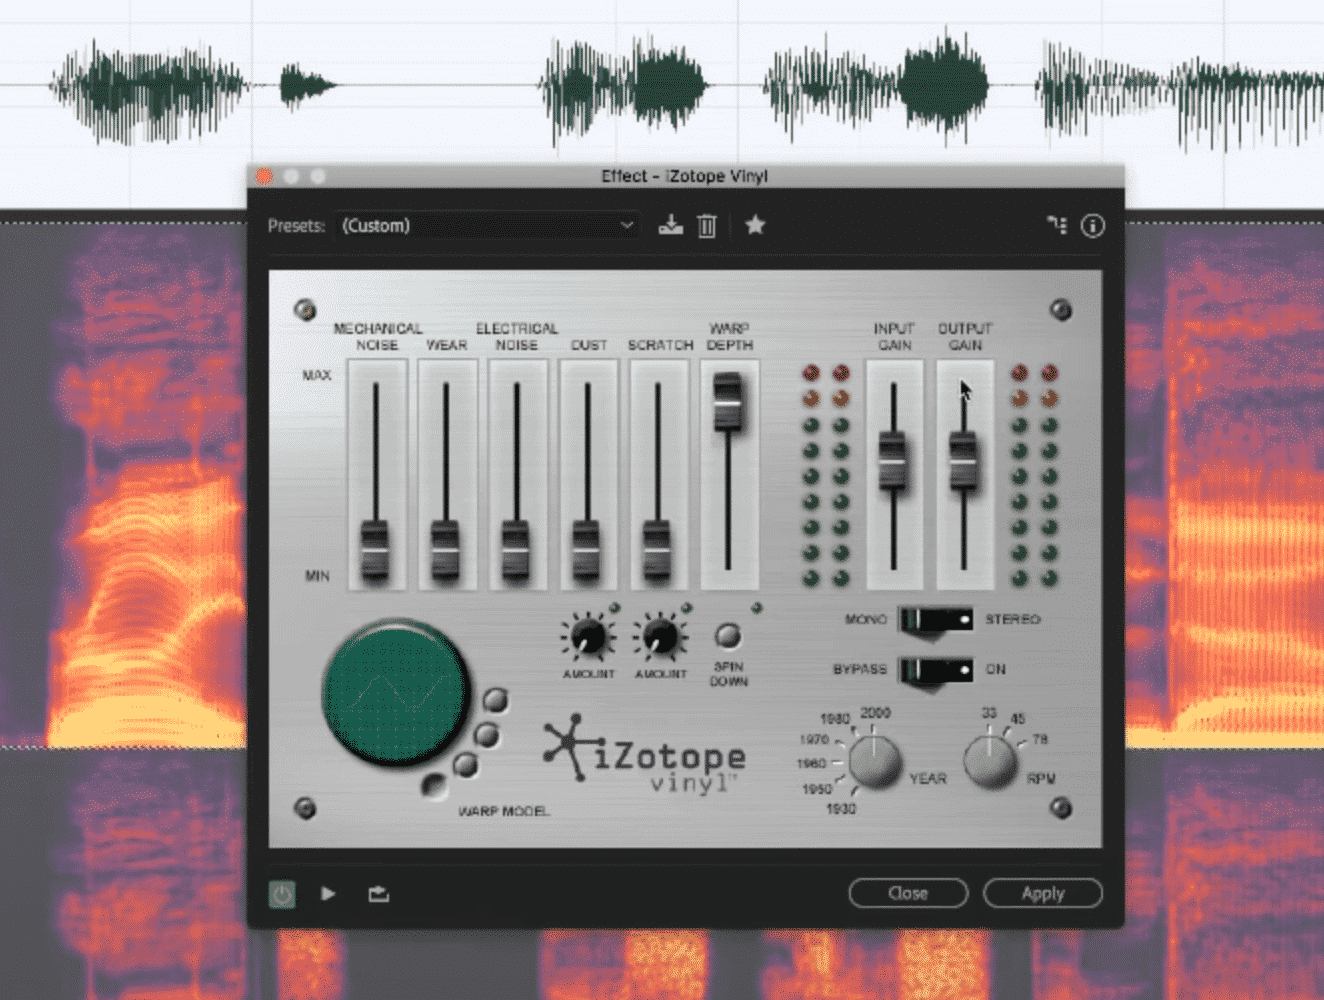
To apply the effects, again select the whole track in Audacity and click Apply.
And there you go, using a combination of equalization, compression and iZotope Vinyl’s third-party plug-in inside Audacity – all completely free pieces of software – you should be able to create a really cool vintage voice effect in Audacity that you can be proud of!
Audacity Presets For Fun
Looking for done for you Audacity preset? Check out our Audacity Fun Presets and see how creative you can get with your audio! Includes vintage audio sound and many more!


