Audio loudness is an important element of great content. You don’t want your YouTube video or podcast to sound a little bit too quiet or way too loud. In this blog post, I show you a secret feature in Premiere Pro that will help you fix volume issues. This might blow you away as it did to me when I discovered it.
Understanding Audio Loudness
Audio loudness refers to the perceived volume of a sound. Having a consistent and balanced loudness level is the key to creating professional-sounding content.
As a content creator, there are loudness standards (aka LUFS) that we should meet. This can vary depending on the type of content you are creating as well as the platform where you will publish your project. For example, Spotify is -14 LUFS while SoundCloud is -8 to -13 LUFS. This is important to know in creating content that sounds similar in volume across different platforms.
Premiere Pro’s Secret Feature
All this time, I’ve been using Adobe Audition to export my projects to have the right loudness. I used to transfer the audio files from Premiere to Audition, which is somewhat time-consuming. Fortunately, I discovered that you don’t have to leave Premiere Pro to do that.
So the secret feature inside Premiere Pro is the Loudness Normalization settings on the Export tab. This allows you to enter a specific Target Loudness (in LUFS) for your project. Doing this will ensure that the audio level of your file is the same from the start until the end.
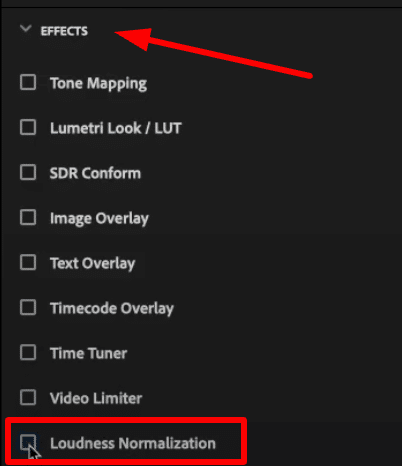
To do this, open the Effects menu on the Export window of Premiere Pro. Scroll down and tick Loudness Normalization.
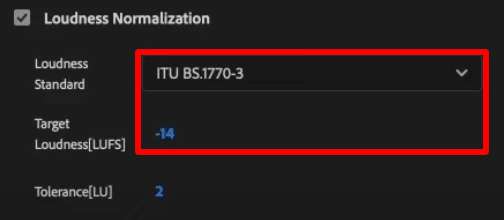
Once you tick it on, you’ll be able to manipulate a few settings. It can be confusing which settings to change but it’s actually simple. You just need to do two things.
First, under Loudness Standard, choose ITU BS.1770-3, which is used as the Standard in the United States and Europe. And then change Target Loudness (LUFS) depending on the project. For example, if you are doing a YouTube video, it should be -14 LUFS. On the other hand, put -19 or -16 LUFS if you are exporting a mono or stereo audio podcast, respectively.
What Changed?
If you are wondering what is the difference when you add Loudness Normalization to your projects, let me show you through their waveforms. The first picture is the original file while the second is the project with Loudness Normalization applied.
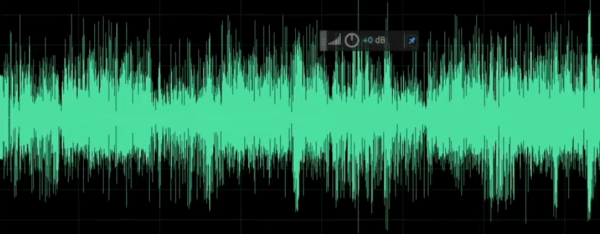
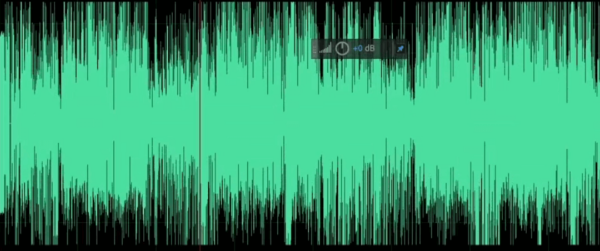
In the first picture, you’ll see that levels are all over the place. While on the second picture, the audio level from start to finish is consistent.
Final Thoughts
Audio Loudness is a crucial factor in making YouTube videos and podcasts. Thanks to Premiere Pro, you can easily normalize audio to make your recording sound professional. You just have to tick a few settings before you export your project.
Streamline Your Editing Process
Transform your videos with professional flair! Discover our exclusive Premiere Pro presets today and elevate your editing game. Check them out now and make your content stand out!