In this blog, I’ll show you how you can really quickly remove wind noise from a video in Adobe Premiere Pro. I will be sharing a variety of tools for this but each method is easy to follow with screenshots where needed.
High Pass Filter
An easy way to remove wind noise in Premiere Pro is to go into the Effects Workspace or the Effects Window and search for the High Pass Filter. Drag and drop that onto your clip, and then turn the Cutoff setting up until the wind disappears. Start with a minimum of 10 and slowly turn whilst you monitor audio.
The issue with this method is that, as well as removing the wind noise, it might thin out your vocals – so it’s an easy, but a rough way to remove wind noise.
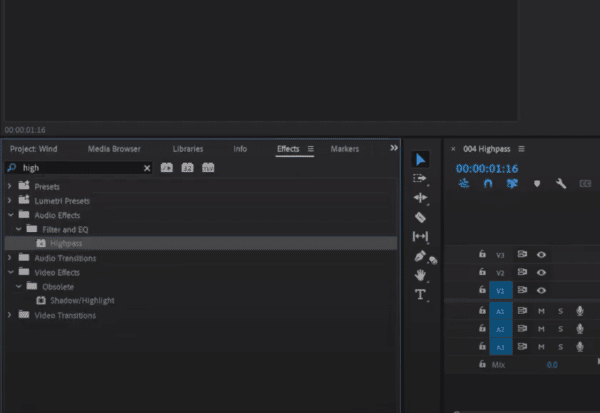
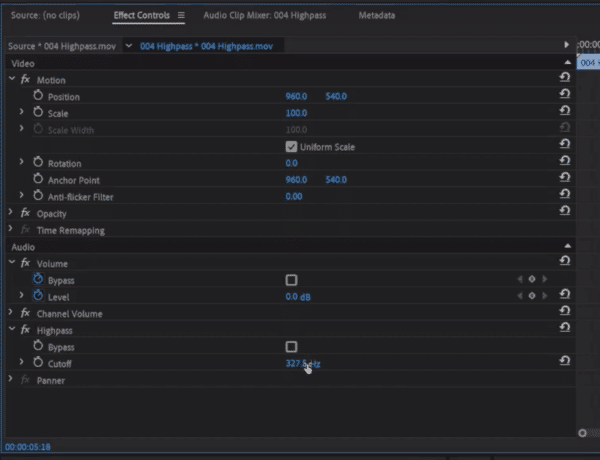
Next Level Noise Removal
Now, if you want to take your noise removal to the next level, you’ll need to get into Adobe Audition by right-clicking on the dialogue and selecting Edit Clip in Adobe Audition. You will find many more less destructive editing options to work with the noisy audio.
Spectral Frequency Display
This will open the clip in Audition where you can open up a few things that will help you analyse the wind in your clip.
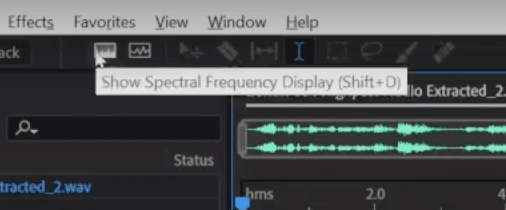
First, open Spectral Frequency Display by clicking the icon in the top left or Shift + D and you’ll be able to see the wind in yellow. This will come in handy in just a second. Trust me – you want to SEE the audio you are editing.
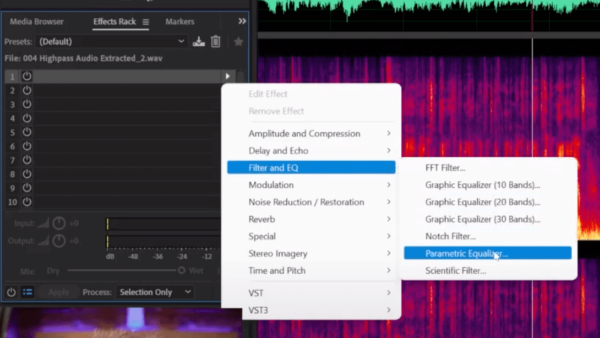
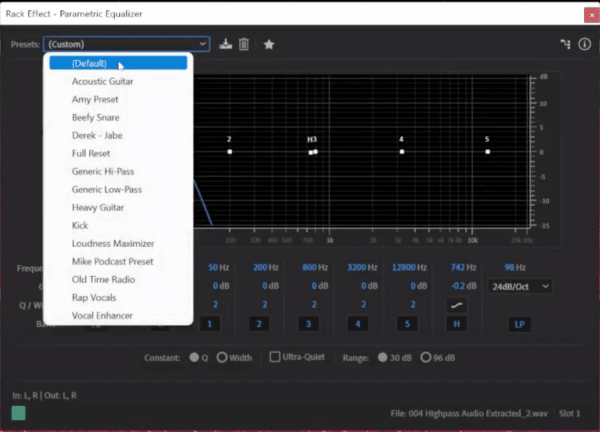
Go to Effects Rack > Filer and EQ > Parametric Equalizer, set it to Default, and put in a High Pass Filter, which will roll the wind noise off.
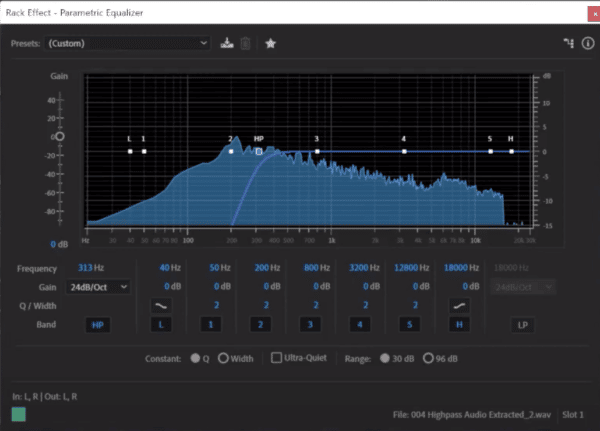
If you go into Preview mode by selecting the icon in the top right, you’ll be able to see before and after versions – and that there’s much less yellow colour than before!
Extra Low Pass Filter Settings
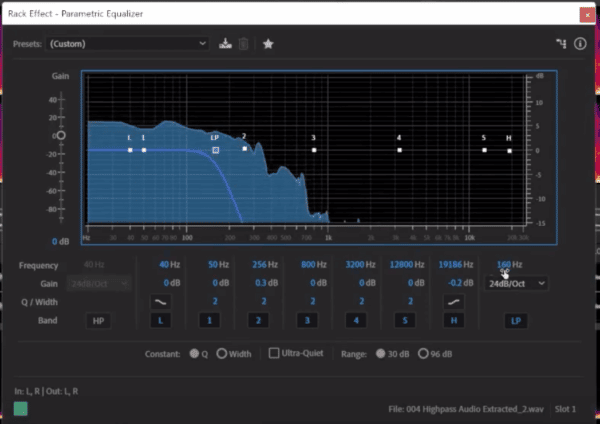
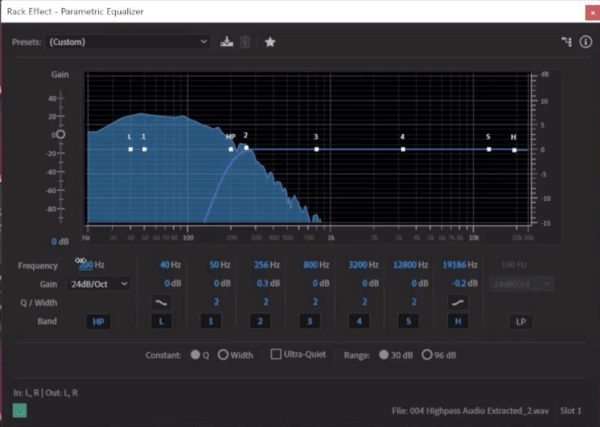
If you want to be even more accurate, you can switch on Low Pass Filter and then drag the LP down, before dragging it up until you hear dialogue, put the High Pass back on to where you got to and that will be the sweet spot for your clip.
Finishing Touches
Then, close the window, click Apply to apply it to your clip, switch off Preview mode, then hit CTRL / CMD + S to save it and you’ll see the best thing – when to go back into Premiere Pro, the clip updates with the edits you’ve made in Adobe Audition.
It’s as simple as that to remove wind by either using the High Pass in Adobe Premiere Pro, or by using the more detailed Spectral analysis available to you in Adobe Audition.
If you’re working with dialogue, different microphones or you need to do some noise reduction in your videos, you need my free Adobe Premiere Pro Presets!


