Creating great podcasts involves more than just recording content. It also includes polishing the recorded audio. With Adobe Audition, you can achieve professional-sounding podcasts, even if you’re just starting out. In this Adobe Audition for Beginners guide, we’ll explore some essential features and techniques in Audition that can help you take your podcast to the next level.
Use Markers
Markers are like audio bookmarks. Adding markers to your timeline allows you to quickly jump to specific points in your podcast. This makes it easier to navigate and edit your content.
To add markers, press the “M” key at specific points where you want to make edits or add effects. You can do this while listening to your podcast.

After adding markers, you can quickly jump to different parts of your podcast by clicking on the markers in the timeline.
Finally, you can label the markers to make it easier to identify key sections of your podcast. This includes introductions, interviews, or the ones you want to edit. To label a marker, just double-click on it.
Use Multitrack
Adobe Audition’s Multitrack view allows you to work on multiple audio tracks simultaneously. This feature is particularly useful for podcasts with multiple hosts or audio sources. With this, you can easily manage your podcast’s audio, music, and sound effects. Moreover, it provides a visual representation of your podcast’s timeline, making it simple to cut, move, and arrange audio clips as desired.
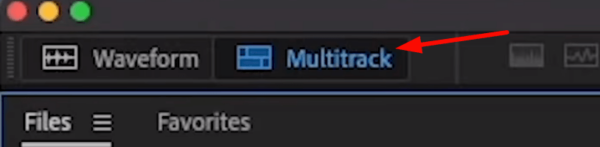
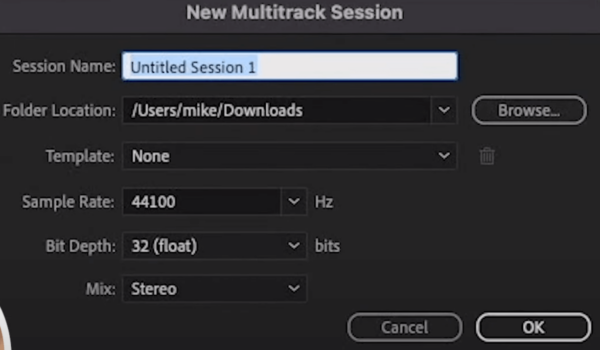
To start a new multitrack, go to the uppermost left side of your workspace and click Multitrack.
On the Multitrack Session tab, change the session name, make sure the Location Folder is right, and you can also edit the other settings. Once done, press OK.
After you create a new multitrack, you can add the audio files to your timeline. Make sure to separate each file into different tracks.
Pro Tip: Press Shift+E to delete tracks you don’t need.
Match Loudness
If you are working on 2 or more tracks, you will need to ensure that they have the same audio levels. Consistent audio levels are crucial for a professional podcast. Fortunately, Adobe Audition offers a “Match Loudness” feature that makes this task easy.
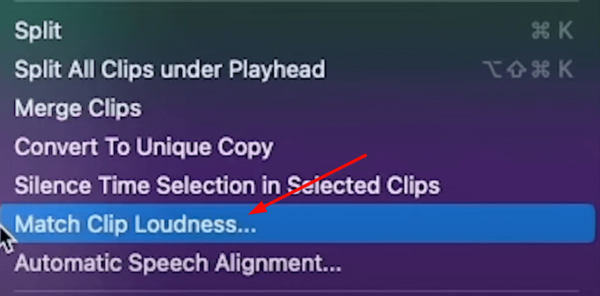
To do this, select the tracks, double-click, and then choose Match Clip Loudness.
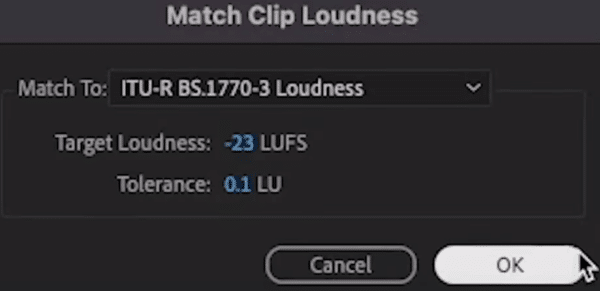
On the next tab, you can set your target loudness. After that, press okay. it will analyze your audio and make necessary adjustments to match the loudness target and create a polished sound.
Use Ripple Delete
The next great feature in Adobe Audition is the Ripple Delete tool. Ripple Delete automatically closes gaps when you remove or cut audio sections. This tool maintains the flow of your podcast without leaving awkward pauses.
To use Ripple Delete, select a section of your audio you want to cut, double-click, and click Ripple Delete. Choose the best option from the menu.

For example, if you highlight a section on all tracks then choose Time Selection in All Tracks.
Overall, Ripple Delete keeps your podcast sounding seamless by eliminating any unwanted silences.
Add Crossfade
One feature I recommend you add after using Ripple Delete or cutting a section of your audio is to add crossfades. Crossfading allows one audio clip to fade out as another fades in. This creates a natural transition which is essential for a professional-sounding podcast.
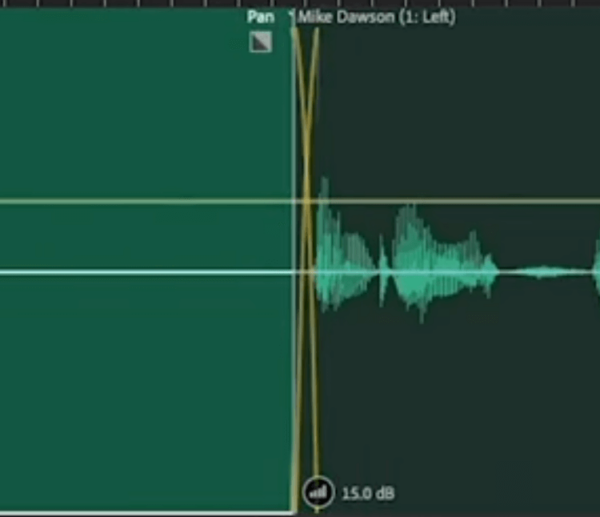
To add crossfades, select the tracks, grab them by the title, and slowly move the clip either left or right to overlap with the other section. You should see a yellow X-line to indicate that the crossfade has been added.
Crossfades help make your podcast sound polished by eliminating harsh audio transitions.
Use Parametric Equalizer
Parametric Equalizer adjusts the balance between different frequencies in your audio recording. With parametric EQ, you can enhance certain frequencies or reduce others, depending on the desired effect.
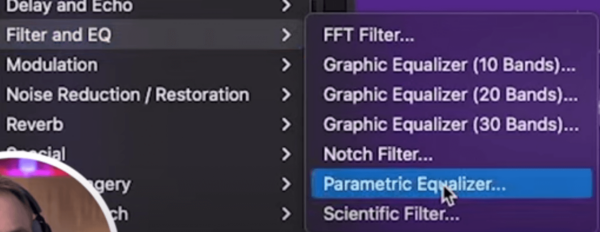
To use Parametric Equalizer, go to your Effect Rack > Filter and EQ > Parametric Equalizer.
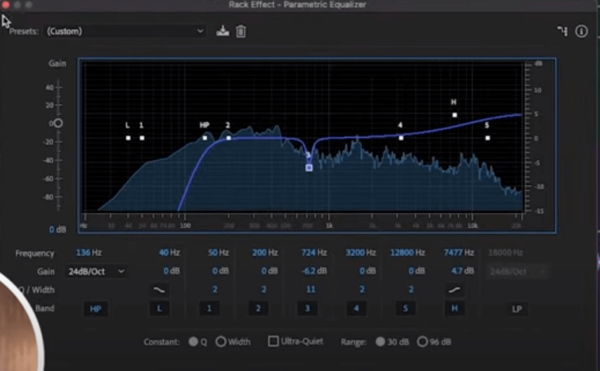
On the Parametric Equalizer window, you can manipulate the audio frequencies to make your podcast sound better. For example, you might want to increase the high-end frequencies and change its shape, which can help make your voice sound clearer and crispier. Also, you can eliminate low-end rumbles by reducing the low-end frequencies.
Add Compression
Compression is an audio effect that reduces the dynamic range of your audio recording. By reducing the difference between the loudest and softest parts of your audio, compression can help you create a more consistent sound and prevent distortion or clipping.
To add compression, go to your Effect Rack > Amplitude and Compression > Dynamics. On the dynamics tab, check Compressor and then adjust the threshold, ratio, and gain settings to your desired level.
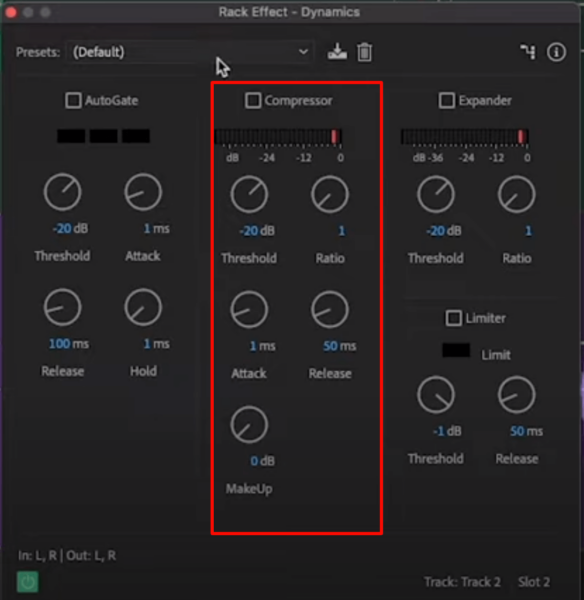
The Threshold determines the point at which compression starts to take effect, the Ratio determines how much compression is applied, and the Gain adjusts the overall volume of the audio after compression has been applied.
Final Thoughts
Making your podcasts sound awesome is achievable with Adobe Audition. Audition provides tools and features that easily polish your recording. These include markers, multitrack, parametric equalizer, compression, and crossfades. Experiment with these features, practice regularly, and watch your podcasting skills improve over time.
Podcast Magic in a Click!
Dream of studio-quality sound without the fuss or cost? We’ve got you covered! Our audio presets offer:
- Swift edits: Meet deadlines effortlessly with ready-to-use settings.
- Uniform Vibes: Let each episode shine with consistent quality, making binge-listening a breeze.
- Expert Touch: Benefit from the genius of seasoned audio pros.
- Simplicity Galore: Novice or not, make your podcast sound stellar easily.
- Save those Bucks: Pro sound, without the pro price tag.
Sounds like a plan? Explore our presets here!
Further Reading:
- Adobe Audition Podcast Tutorial – How to Record and Edit a Podcast From Start to Finish
- How To Sound Crispy in Adobe Audition – Guide On How To Sound Better
- How to Use the Audio Equalizer in Audacity? | Audacity Tutorial for Beginners
- Why Adobe Audition is Still the BEST After 20 Years!
- How To Master Audio Editing in 5 Easy Steps – Become an Adobe Audition Pro Today!