Hello! In this blog, I’ll be giving you a beginners’ guide to using the free open-source audio editor, Audacity!
Audacity is cross-platform compatible, it’s free, it’s open-source, and it does a lot of stuff when it comes to audio production.
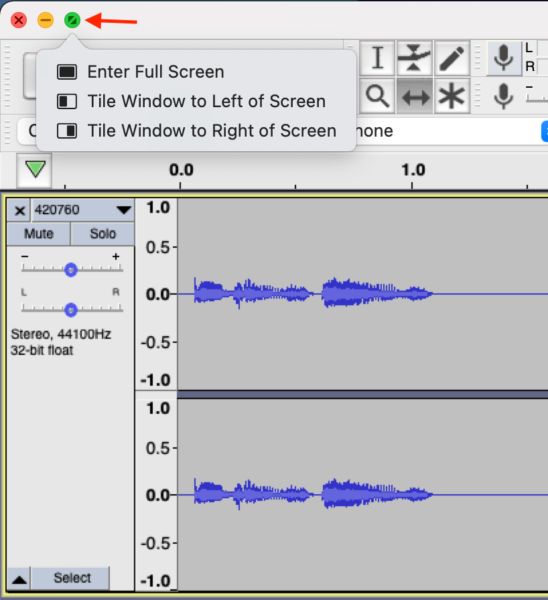
To get started, open Audacity and click the green maximize button to open the window up to a full screen so you can see clearly what you’re working with.
Audio Hardware Setup Inside Audacity
If you’re a complete beginner, head up to the Core Audio section at the top of the screen where you’ll see the input (what you’ll use to record the audio) and output (what you’ll use to listen to the audio once you’ve recorded).

Select the correct options from the drop-down menus (it could include your built-in microphone, a webcam mic, or an external mic).

Usually for something like a built-in microphone you’ll have a choice of two channels – mono and stereo. Select mono here to simply have one channel.

Then, select your output – this could be your built-in computer output, or it could be your audio interface output that you’ve plugged in to some external speakers, for example.

Once that’s all set up, you’re ready to record your first piece of audio into Audacity!
How do you do that? Well, it’s super simple!
Recording Audio Inside Audacity
The buttons in the top left of the screen will be familiar to you if you’ve used a tape recorder or anything similar, and all you need to do to record is hit the big red button and record your audio.

To stop recording, either hit the spacebar or the yellow square stop button.
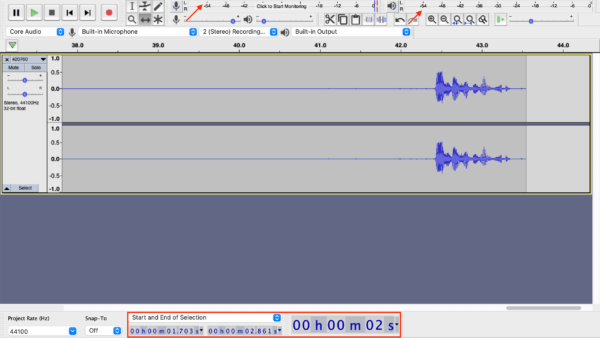
When recording, you’ll notice the levels appear at the top next to the microphone, showing you how loud you are. If you’re hitting the yellow or red, you’re getting a bit too loud.

The numbers across the top of the recording are the time in seconds. Click anywhere along here to drop the play bar and begin playing from that point (by pressing the play and stop buttons or just clicking in the time bar where you want to play).

You can also stop playing by hitting the pause button and hitting it again to start playing again from the same point. And the rewind and fast forward buttons will take you to start and end of the track you’ve recorded.

At the top in the middle, you have input and output volume levels. And the numbers in the bottom left are the audio position times in seconds.
And that’s just about it. I hope this beginners’ guide to using Audacity has been useful! Let me know how you get on! I release new videos every week and teach how to do audio production. Make sure to subscribe to my channel.
If you are after epic voice overs for your next project – my team at Music Radio Creative is here to help.
Audacity “Cheats”
If like me you like the “easy” then give my Audacity Settings a try! I have created my very own presets for Audacity users. In simple clicks you can apply amazing voice settings to your projects.

