Hello and welcome to another of our Adobe Premiere Pro Tutorials! In this blog, I’ll show you how to make dialogue sound better in Premiere Pro, using the same steps that I apply every time I’m producing a video with dialogue in Premiere Pro.
Premiere Pro – First Steps
Before even opening Premiere Pro, the very first step to getting great audio is to record with a good quality microphone and sync it to your camera audio, rather than using your camera’s internal microphone.
Assuming you’ve done this, and you’ve got a good quality shotgun mic or condenser microphone recording, you can make the dialogue you’ve recorded sound even better with a few simple steps.
Getting Set Up
First, open your audio in the A1 channel and your video in the V1 channel. You can drag your tracks open to view the waveform in better detail.
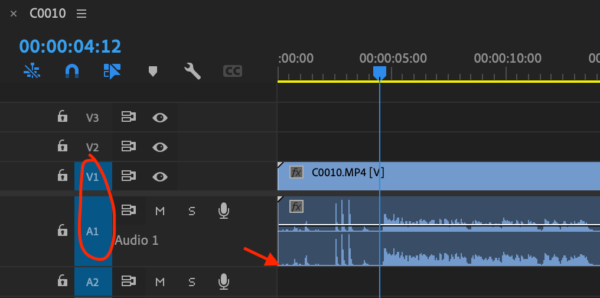
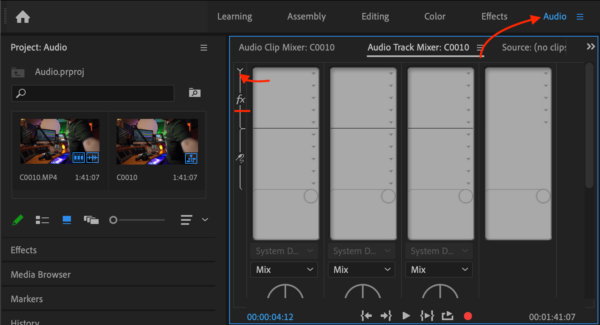
Then, click Audio to head into the audio workspace, which will bring up a mini mixer with all your audio channels in focus.
In the top left, click the tiny triangle (Show/Hide Effects and Sends) and in the bar above your track, next to where it says fx, you can insert different effects to improve the quality of your voice.
Amplitude
The first thing to do is to make sure the volume is at the correct level, by adjusting the amplitude.
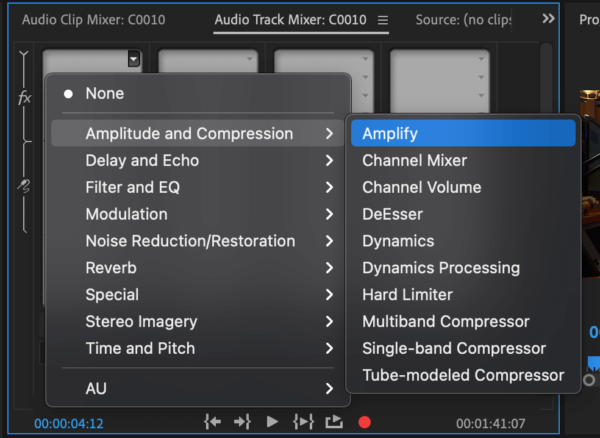
Start by going into the effect selection > Amplitude and Compression > Amplify.
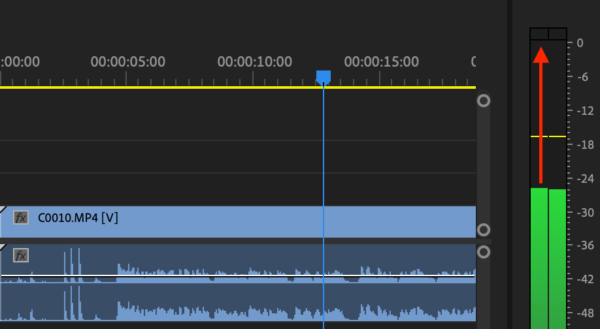
To maximize your audio, double click Amplify and play around with the dB level until you’re happy. It should be close to 0dB, without going into the red zone when you play it back. Close the window and listen again to hear the difference.
EQ
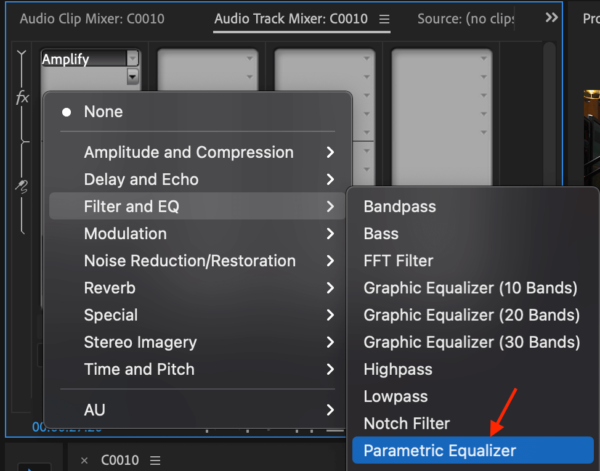
Next, add some EQ by again going to the effect selection > Filter and EQ > Parametric Equalizer. This is one of my favorite effects to increase the clarity of audio you’ve recorded.
Once you’ve added that effect, you’ll want to add some high end and take off some low end. Open the window by double clicking Parametric Equalizer and add a High Pass filter by clicking HP.
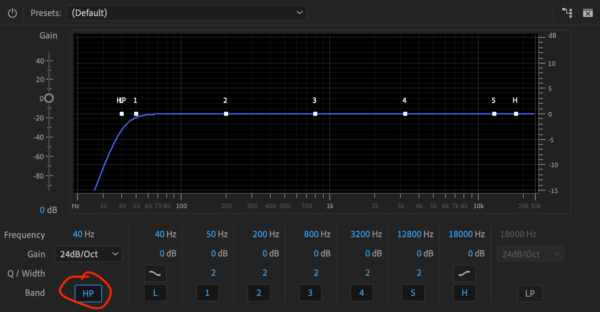
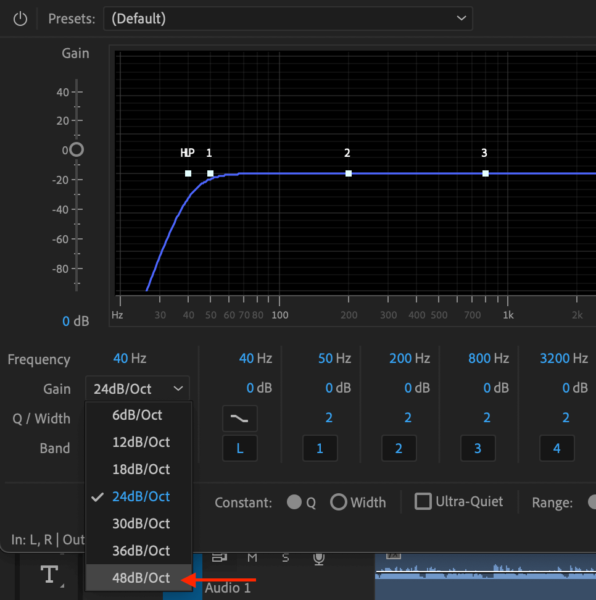
Change the Gain to 48dB/Oct, which will give you a nice sharp roll-off, losing those base frequencies we don’t need. You can then grab and drag the apex of the curve to the point where your voice just starts to sound thin, then take it back a little to get that base level just right.
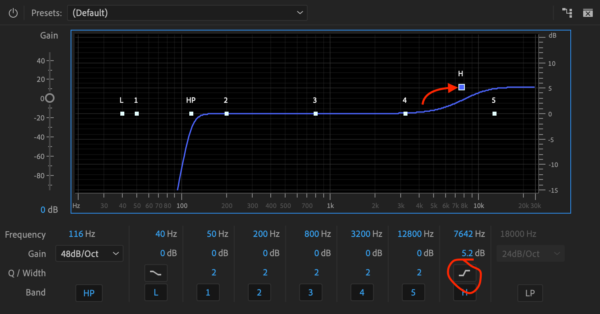
After that, we’ll add some high end. Start by changing the shape of the curve using the Q/Width icon on the far-right hand side and add a subtle increase in the high end to make your voice sound nice and crisp.
At this point, you’ll probably find that the decibel level of your audio has increased, and so you’ll see it go into the red when you listen back. To fix this, head back into Amplify and take the level down a notch so you’re sitting just below 0dB.
Dynamics
Next up is one of my favorite ever effects in Adobe Premiere Pro – the Dynamics effect. You really can do so much magic with this effect!
To add it, again go to the effect selection > Amplitude and Compression > Dynamics and double click the effect to open the Dynamics window.
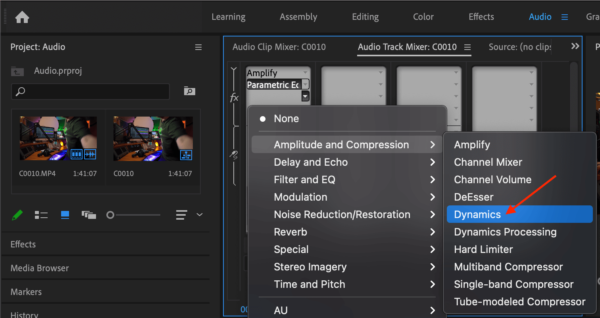
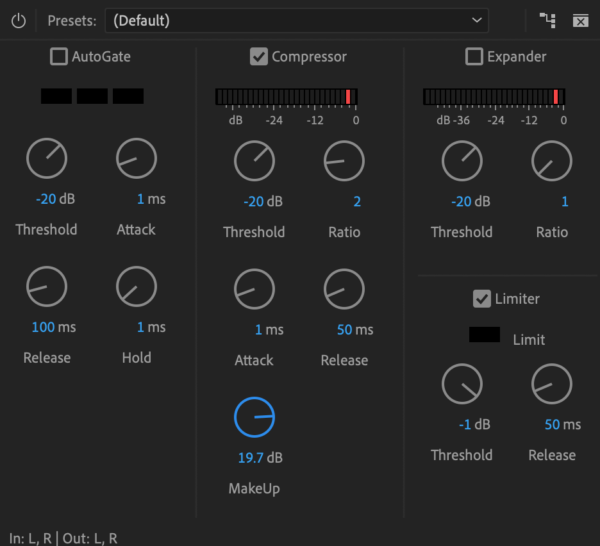
Once you’re in, don’t worry too much about the Gate or Expander, for now we need to focus on the Compressor and the Limiter.
The Compressor will compress the high bits of your voice down, making it easier to listen to. Start off with the Threshold at the default of -20dB and push the Ratio up to around a maximum of 2.0. We can keep the rest of the Compressor controls at the default levels.
Finally, the last step in making your dialogue sound better in Adobe Premiere Pro is the Limiter. First, tick the box to enable it and set the Threshold to around -1dB. This, as the name suggests, will set a limit of -1dB, so your audio will not be able to go any higher.
Leave the Release at the default of 50ms. Then, push up the MakeUp so that it’s just going into the red, before moving it down just a little bit to get it spot on.
And there you go! With these three simple steps of adding the Amplitude, EQ and Dynamics effects, you can have better sounding dialogue in Adobe Premiere Pro CC in no time!

