Audacity is a great free beginner audio editing software. In this blog, I’ll be showing you how to trim audio in Audacity easily.
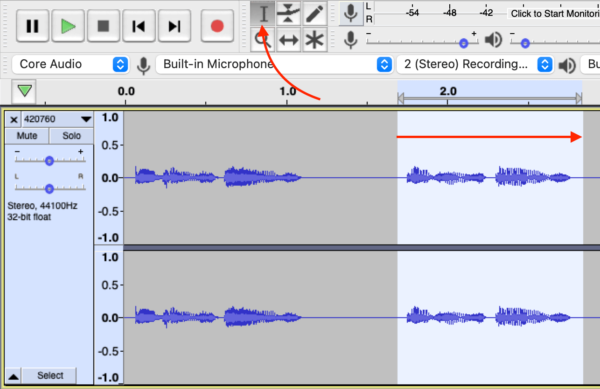
First up, use the Selection tool and hold the cursor down from the start to the finish of the audio you’d like to keep.

You can adjust the start or finish by simply grabbing the start or finish point of your selection with the finger of the cursor and moving it backwards or forwards.

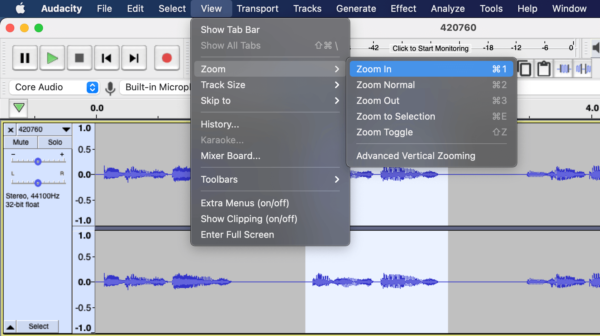
To zoom in or out for a more precise trim, go to View in the top menu and select Zoom In or Zoom Out. You can also use the keyboard shortcuts, ctrl+1/cmd+1 and ctrl+3/cmd+3.

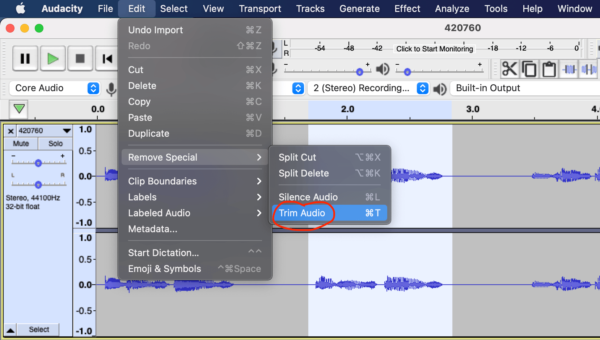
To remove the sections you’d like to lose, simply go to Edit > Remove Special > Trim Audio (or use ctrl+T/cmd+T). This will cut out the areas before and after the selection, leaving you just with the piece you’ve top and tailed.

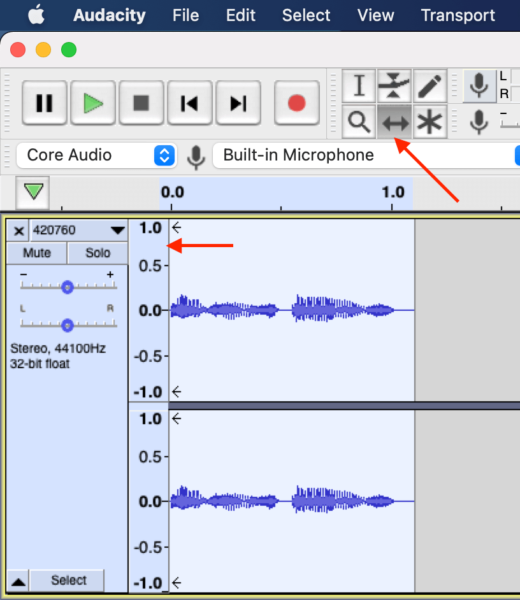
Then, go to the Time Shift tool (the two arrows) and drag your selection to the start of the track, so it starts at zero seconds (but not before!).

And there you go! You should now have a nicely trimmed piece of audio that you can go ahead and save or export as you wish.
To learn more about audio production make sure to subscribe to my YouTube channel. I release videos weekly.
If you are looking for voiceovers for your audio projects. Make sure to check my team of professional voice over artists.


