Adobe Audition is a powerful digital audio workstation (DAW) that offers a wide range of tools and features for recording, editing, and mixing audio. To maximize your efficiency and workflow in using this software, it’s important to familiarize yourself with its various tools and customization options. In this blog post, I’ll guide you through five easy steps to master Adobe Audition.
Step 1: Learn Keyboard Shortcuts
Keyboard shortcuts are a game-changer when it comes to speeding up your workflow and navigating through Adobe Audition with ease. By mastering these shortcuts, you can edit your projects quickly and efficiently.
You can view and explore the available keyboard shortcuts in Audition, by going to Edit > Keyboard Shortcuts.
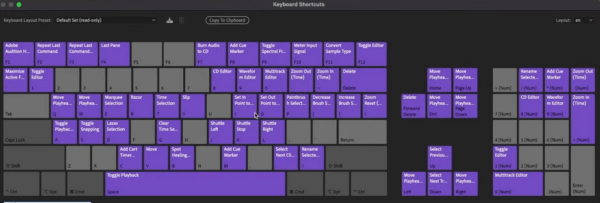
To quickly learn and master the different shortcuts, practice using these shortcuts regularly until they become familiar. You can also customize the keyboard shortcuts to match your preferred workflow.
Some of my favorite shortcuts are:
- 1 – toggle between multitrack and waveform
- Shift+D – toggle on/off spectral frequency view
- Cmd/Ctrl+C – copy
- Cmd/Ctrl+V – paste
- Alt/Option+Drag – duplicate
Step 2: Customize Appearance
Audition is a big fan of dark gray color schemes. But that doesn’t mean that you should also go dark gray. Audition has the option to change the appearance of your workspace. By customizing the appearance of Adobe Audition, you can create a workspace that suits your preferences and enhances your productivity. To do this, go to Preferences > Appearance.
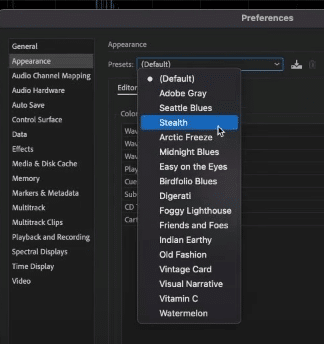
You’ll be presented with different presets. You can choose one from the list and you can also manually change the color of your waveforms, playhead, and markers under the editor tab. Make the most out of this to show your personality and creativity, and enhance your experience using the software.
Step 3: Create Templates
Creating templates in Adobe Audition can save you time, especially if you find yourself frequently performing repetitive and similar editing or mixing tasks. Templates allow you to start new projects with pre-configured settings and tracks.
To save a template in Audition, go to File > Export > Session as Template. Give the template a filename.
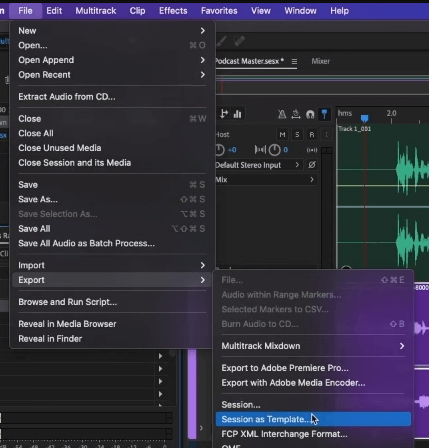
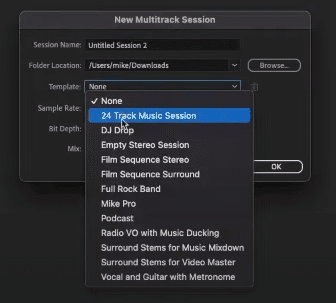
And then if you want to access your template, just go to File > New > Multitrack Session. On the multitrack panel, choose the saved template. This will recall not only your audio but also the track effect settings you applied.
Step 4: Create Presets
Presets in Adobe Audition are pre-configured settings for specific effects or processes. These allow you to add the same settings across multiple projects, saving you time and ensuring a uniform sound.
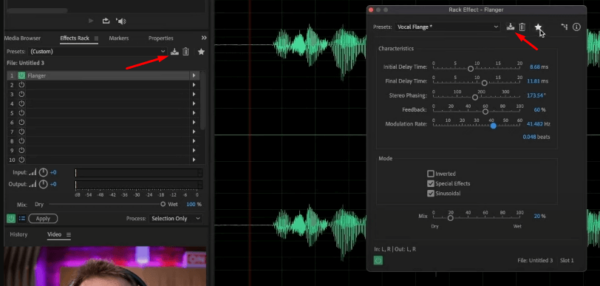
To save effects as presets, just click the Save Preset icon that is usually found on top of every audio effect in Adobe Audition. Make sure to name the preset to easily recognize it when you want to use it in other projects.
Step 5: Assign Presets to Shortcuts
The final step in this list to become an Adobe Audition Pro is to combine the first and fourth steps. That is to assign a keyboard shortcut to a specific preset. This allows you to apply effects or processes with a simple key press.
To do this, we first have to add the preset to our favorites by going to Favorites > Start Recording Favorite. And then on the effects rack, make sure the right preset is selected and click Apply. Finally, go to Favorites > Stop Recording Favorite and name the file.
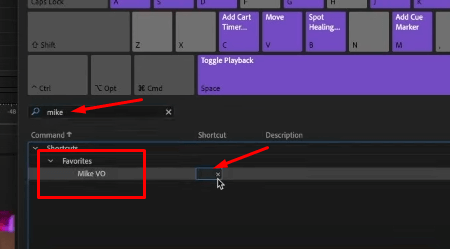
Now, to assign a shortcut to the newly saved favorite preset, go to Edit > Keyboard Shortcuts. On the keyboard shortcut panel, search the name of the preset and then assign a specific keyboard shortcut.
Final Thoughts
Mastering Adobe Audition can be challenging but doable. By learning keyboard shortcuts, customizing the appearance, creating templates and presets, and assigning them to shortcuts will streamline your editing workflow and save time.
Learn To Produce Audio Like a Pro
Are you producing audio for a living?
If audio production already is your job or you aim for it to be your full-time job – then this is for you!
Learn how to become a master audio producer with Mike Russell, the Adobe certified expert. This Audio Production Course is designed for audio enthusiasts looking to produce audio on a professional level.


