Video editing has become more sophisticated and accessible than ever before. In 2023, one of the developments in this field is the introduction of text-based video editing. This feature streamlines the editing process, especially for content creators. In this blog post, I’ll discuss what text-based video editing is, how to use the text-based editor in Adobe Premiere Pro, and give you tips on how to make the most out of this feature.
What is a Text-Based Video Editing
Text-based video editing allows editors to manipulate video clips by editing the text transcript of the video. Just like editing a Google Doc, you can remove words or phrases, and you’ll see these changes reflected automatically in your video recording. It’s essentially a way to streamline the editing process by saving time and improving accuracy.
How to Use the Text-Based Editor in Adobe Premiere Pro
Step 1: Create a New Project
Start by creating a new Premiere Pro project. Make sure to name it.

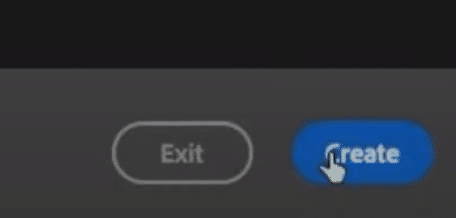
Select the video or audio file that you are going to work on and click Create.
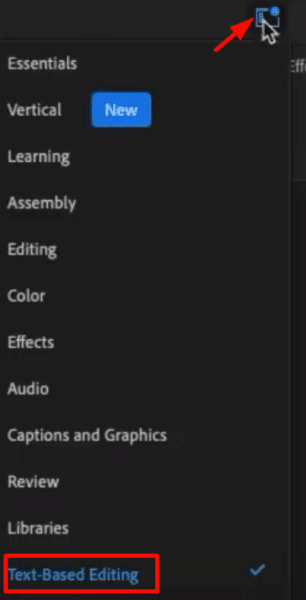
Then, select the Text-Based Editing work view at the top left side of your workspace.
Step 2: Transcribe Audio
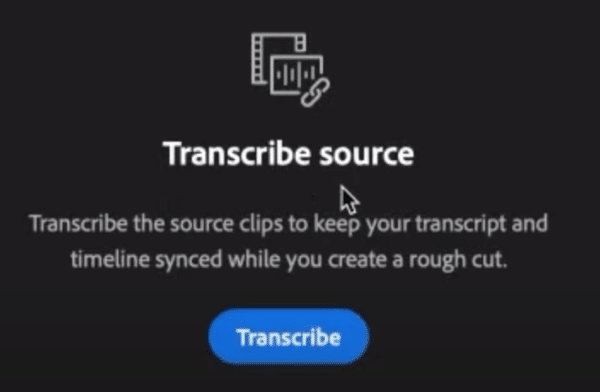
Inside your Premiere Pro workspace, double-click on your audio or video file. An option to transcribe your file will be on the left side of your workspace. Just press Transcribe.
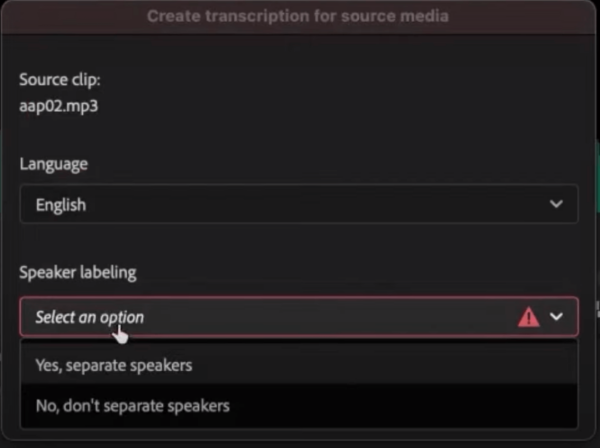
A new window will pop up. Select the Language of your clip. And choose the right Speaker Labeling. If you have 2 or more speakers and you want to transcribe their speech separately, select Yes. If not, just choose the No option.
Finally, click the Transcribe button below. Depending on the duration of your video, it can take a while for your transcription to be finished. You can check the progress of your transcription by clicking the Check Mark icon at the top left of your workspace.

Step 3: Start Editing the Audio
On the left side of your timeline, the transcription of your clip will be presented. This is where you will make the edits. As you scroll through your transcript, you’ll see the playhead jump to the corresponding point in the video.
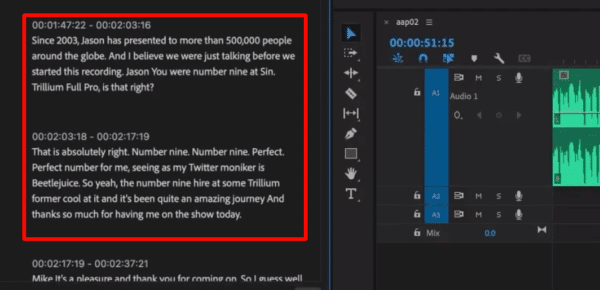
To delete or cut, simply highlight a text you want to remove and press Delete. Also, if you want to move a text segment, just copy and paste.
Step 4: Export the Edited File
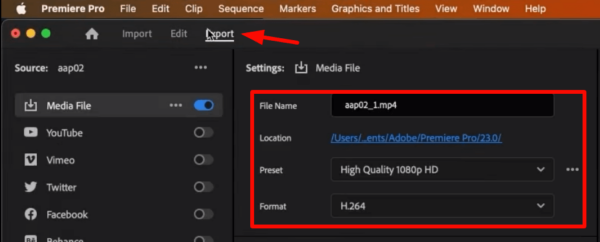
Once you are done making changes, you can export the edited file by clicking the Export tab. Make sure to edit the different settings such as File Name, Format, and Location. Finally, click the Export button at the bottom right side of your workspace.
Text-Based Video Editing Tips
Tip 1: Easily Identify Breaths and Air Sounds
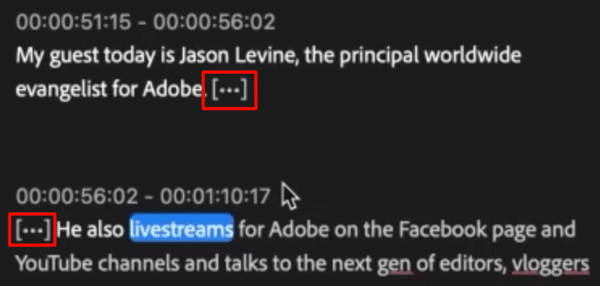
Breaths and air sounds can be easily identified on the transcripts as these are represented by 3 dots. So to remove these, just highlight the dots and then press Delete.
Tip 2: Utilize Audio Units
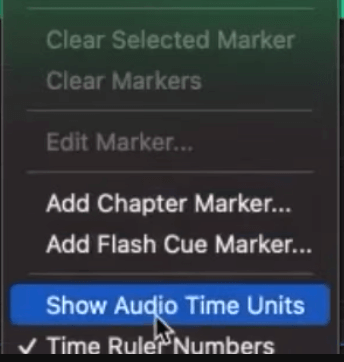
One of the tools we can use to streamline our editing process is Audio Time Units. Compared to Time Ruler Numbers, Audio Time Units allow us to work with time units instead of video frames. This enables us to be more precise in making changes to our audio or video.
To enable Audio Time Units, right-click on your timeline and then click Show Audio Time Units.
Tip 3: Add Effects
Similar to the usual video editing process, adding effects to your file can make it even more polished. So make sure to add some effects to your clip.
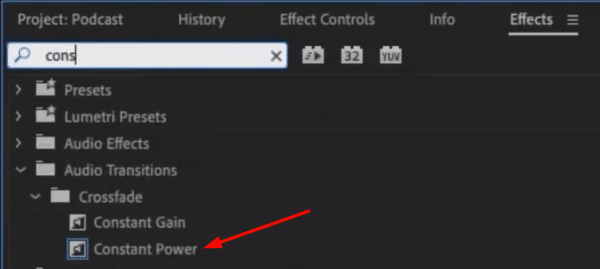
One of the things you can add is audio transitions. I recommend adding Constant Power as it gives a nice crossfade between two audio segments.
There are several effects you can add. Apply anything that will make your edited file more polished and professional.
How to Download the Transcript
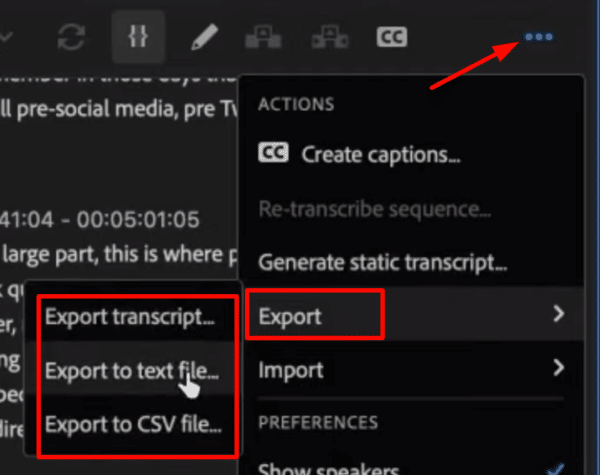
If you want to download the transcript of your video/audio file, you can do that by clicking the three-dot icon above your transcript tab. Click Export and choose the file you want it to be exported to. Finally, choose the location on your computer and be sure to name it.
Final Thoughts
As someone deeply invested in the world of podcasting, the Text-Based Editing in Adobe Premiere Pro is a game-changer. It saves time and effort by simplifying the editing process. It is indeed a valuable tool that every content creator should try.
Dive into Better Sound!
Ever thought of giving your project that Hollywood sound without the fuss? Try out our Premiere Pro audio presets. Crafted by sound gurus, they’re like magic wands for your project’s audio, spicing it up without any of the hard work. New to the sound editing game or don’t have all those fancy tools? No worries. With these presets, you’re set to impress. And guess what? I’ve whipped up some of these for you. Take a peek here!


