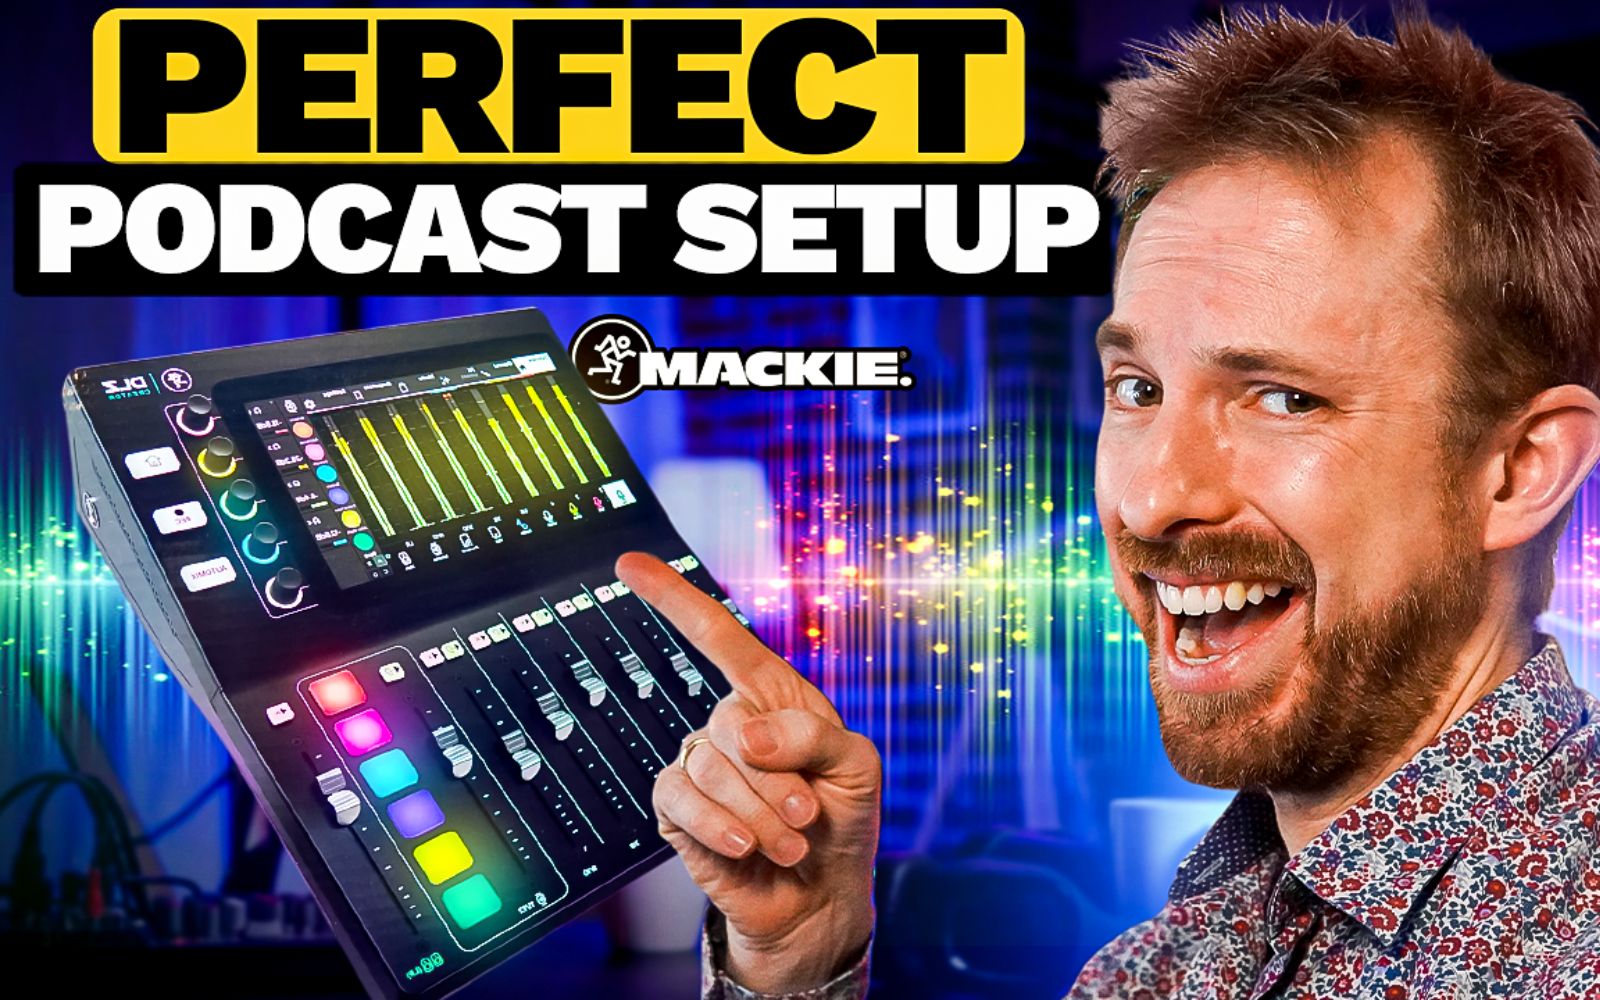
Choosing the right mixer is crucial in producing high-quality podcasts. Mackie DLZ is one of the most popular mixers this year. In this blog post, I’ll guide you through recording a podcast step by step using the Mackie DLZ Creator audio mixer. I’ll show you how to easily set up your microphone and headphones, configure the mixer, and connect it to your digital audio workstation. Furthermore, I’ll show you how to separate audio inputs into different tracks.
Introducing Mackie DLZ Creator
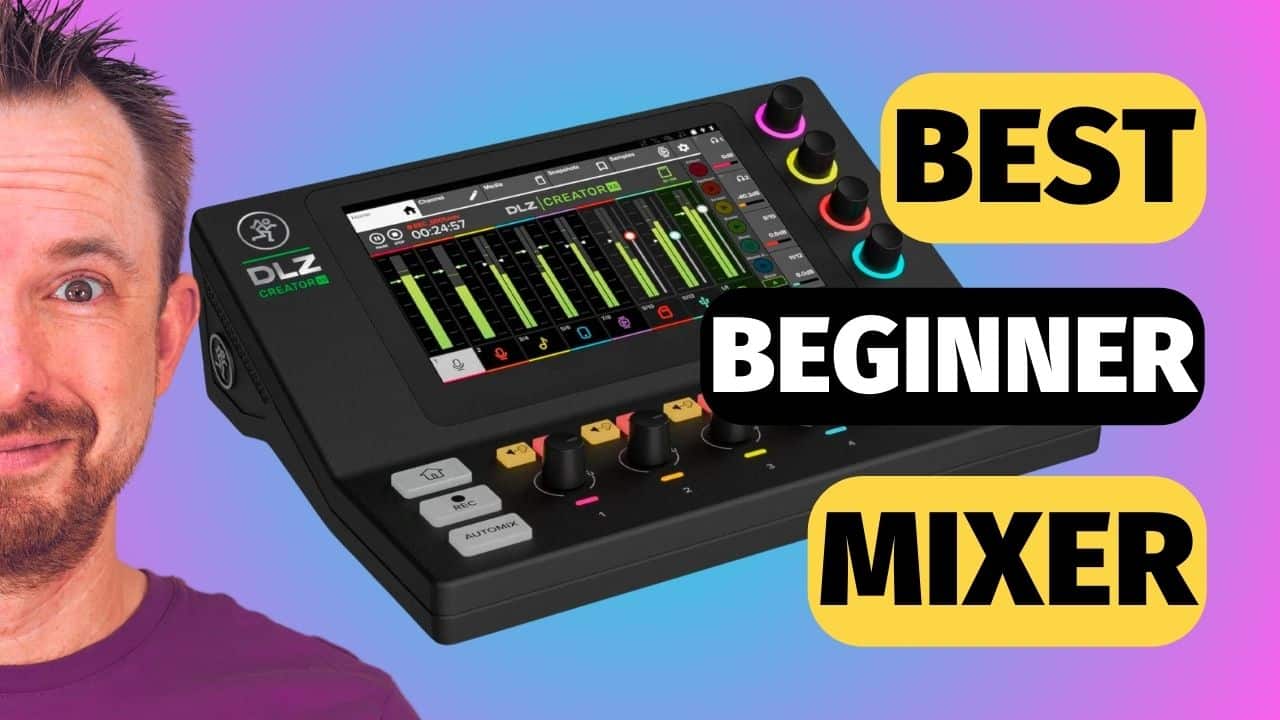
The Mackie DLZ Creator is an all-in-one podcasting and streaming audio solution for creators. With its powerful features such as Mix Agent and Auto Mix, it is perfect for both beginner and professional content creators.
This mixer was released last June and it has already become popular among content creators and podcasters. It is available on Amazon for $799.99.
How to Set Up Mackie DLZ Creator
Setting up the Mackie DLZ Creator is a straightforward process. When you first turn on the device, it will prompt you to do a few things. These include choosing a control mode (Easy, Enhanced, and Pro) and enabling Setup Assistant. If you are a beginner and are not familiar with the mixer, you can enable Setup Assistant and choose the Easy mode. With these enabled, the device will assist you in setting it up.
The first few things you need to do is to connect your microphones and headphones. Connecting these devices is easy. You’ll just have to plug those into the input holes at the back of the mixer. You can also insert a USB flash drive and SD Card into the device.
Furthermore, you can also connect your phone via Bluetooth. By doing this, you can take remote calls via your phone. Moreover, you can connect your Mac or Windows computer via a USC-C to a USB-C cable.
Overall, setting up the Mackie DLZ Creator is easy. You’ll just have to connect tools and devices that you are going to in recording your content.
Does Mackie DLZ Creator work with DAW?
If you are using Digital Audio Workstations such as Adobe Audition, it would be helpful if you could connect it with Mackie DLZ.
Fortunately, YOU CAN!
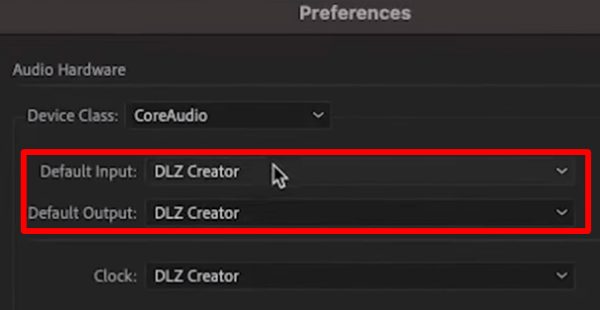
To set this up, open Adobe Audition and then go to Settings > Audio Hardware.

On the Preference window, choose DLZ Creator for both Default Input and Output.
How to Enable Multitrack in the DLZ Creator
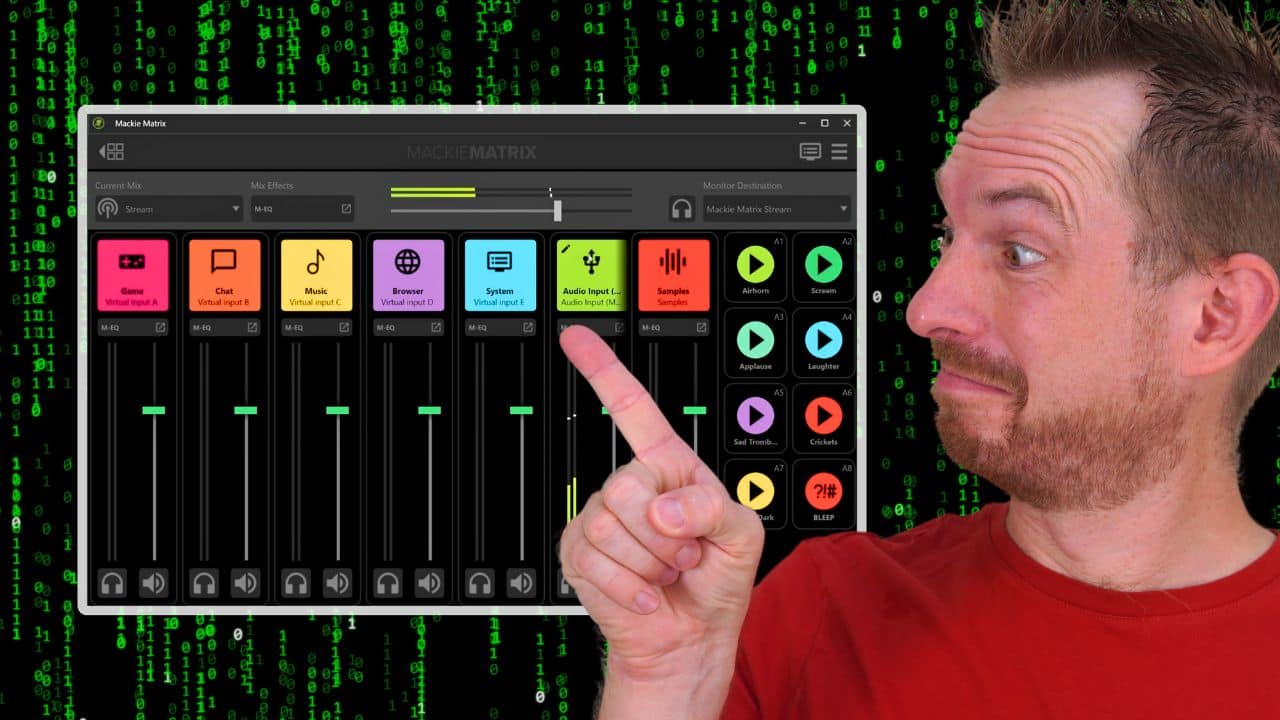
As a podcaster, you’ll often be working on a multitrack in recording your episodes. When you first use Mackie DLZ, you’ll need to enable multitrack manually.
To do this, on your DLZ Creator, go to Settings > Recording/Routing and then enable Multitrack on the Computer (USB) tab.
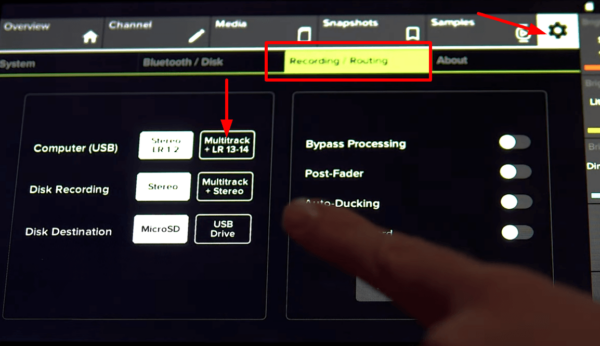
By doing this, you can record multiple audio sources independently. This is especially useful for interviews, remote guests, or capturing different audio sources separately.
How to Set up Different Inputs in Multitrack
If you need to record audio from different sources independently, you’ll need to set up the different recording devices for each track in your DAW.
In Adobe Audition, open a new Multitrack. Then, in the Inputs/Outputs area of the Editor panel, choose the right source from a track’s Input menu.
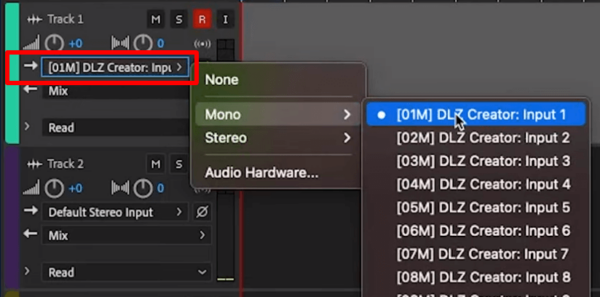
Do this to the different tracks. Make sure to choose the right source either a Mono or Stereo. Furthermore, make sure that you rename each track to easily identify which input it is. For example, if track 2 record background, then rename it to music.
Do This Before Recording!
One important thing to do before you record using the DLZ Creator is to update the firmware. It’s easy to do and will take just a few minutes.
To do this, go to the Mackie DLZ website, scroll down, and click on Firmware Update under the Download and Resources tab.

It will automatically download the latest version of your DLZ creator. Then, copy the file to your SD card. Finally, go to the Media Tab on your Mackie DLZ, select your SD card, and play the downloaded file as a track. It will then prompt you if you want to update your firmware, just press OK.
Updating your DLZ firmware allows you to get all the latest features, bug fixes, and improvements the software has. That is why it is a crucial thing to do.
Start Recording!
Now that we have set up everything, we can start recording.
One of the best features we can enjoy using the Mackie DLZ is recording from different sources simultaneously. For example, you can record calls from your phone, meetings on Google Meet, audio from your main microphone, and background music at the same time.
Again, this is possible if you have properly set up the different inputs and enabled multitrack, which we discussed earlier.
Final Thoughts
The Mackie DLZ Creator is indeed one of the best mixers in the market. With its powerful features like Auto Mix, it is perfect for podcasters. Moreover, this mixer is also recommended for beginner content creators as it is easy to set up and configure.
Elevate Every Word!
Transform your message with dynamic voiceovers from Music Radio Creative’s elite talent. Perfect pitch, pristine delivery. Ready to voice your vision? Let’s create!
Further Reading
- Mackie DLZ Creator vs. RODECaster Pro II – The Best Mixer for Your Podcast in 2023
- The Best Podcast Equipment for 2023: A Comprehensive Guide
- Adobe Audition Podcast Tutorial – How to Record and Edit a Podcast From Start to Finish
- How to Start a Podcast for Free: A Comprehensive Guide
- Podcast Editing Made Easy – Record, Edit, Mix Like a Pro!