A great podcast intro sets the tone, builds anticipation, and instantly tells your listeners what your show is all about. It’s your audio handshake — and when done right, it creates an immediate connection. But hiring professionals for a custom intro can get expensive. The good news? You can make a high-quality podcast intro for free using Adobe Audition and AI music tools. In this guide, we’ll walk you through each step.
Step 1: Generate Music Using AI
Choosing the right music is crucial for an engaging podcast intro. With AI tools like MusicLM by Google, you can now generate free background music tailored to your brand or topic. Just type in a prompt like “upbeat electronic intro for a tech podcast” and let the tool do the work.
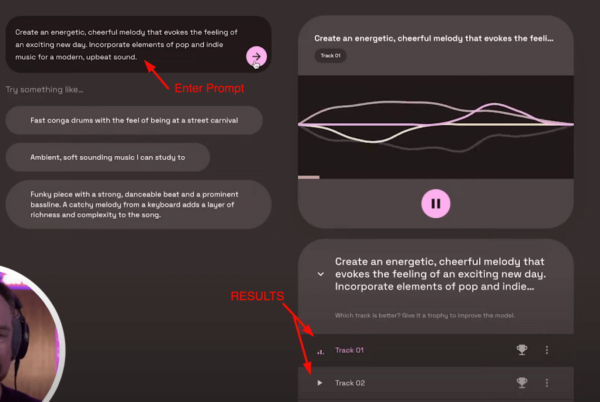
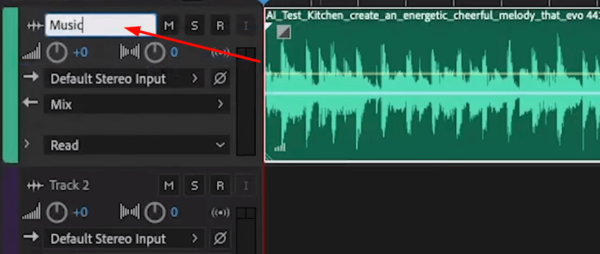
MusicLM provides several track options. Preview each one, and download the one that fits your show’s vibe. Then, open Adobe Audition and start a new multitrack session. Drop your music onto Track 1 and label it “Music”.
Step 2: Record or Add a Voiceover
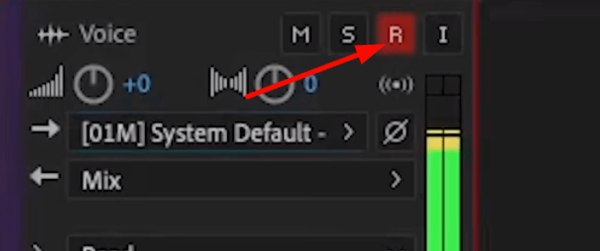
Your voice introduces the podcast, builds trust, and sets expectations. Record it directly in Adobe Audition by pressing the R button on Track 2 to arm it for recording, then hit the red record button to start. You can say something like: “Welcome to [Podcast Name], the show where we explore [your topic] every week.”
Prefer not to record your own voice? No problem! Try our AI voiceover tools or choose from 150+ professional voice actors through our Podcast Intro Maker.
Step 3: Apply Audio Effects
To give your podcast intro a polished sound, you’ll want to balance the levels and enhance the voice with a few effects.
Match Loudness
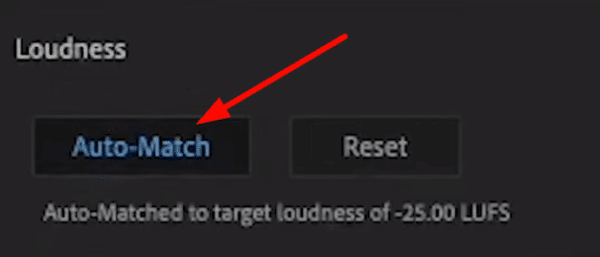
Ensure both your music and voiceover are at consistent levels. Open the Essential Sound panel via Window > Essential Sound, then tag the music track as “Music” and voiceover as “Dialogue.” Click “Auto-Match” on both to balance volume automatically.
Add Compression and Gate
Use the Dynamics effect to smooth out volume spikes and reduce background noise. Navigate to Effects > Amplitude & Compression > Dynamics. Turn on the Compressor and Auto Gate to clean up and level your voice.
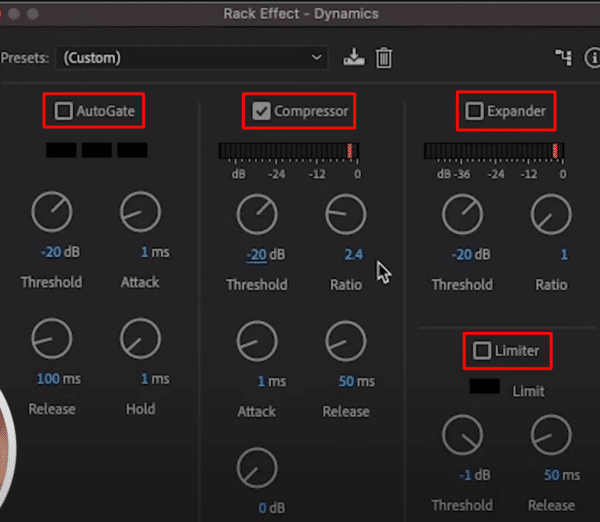
Remix Music to Fit Voice
Use Audition’s built-in Remix feature to match the music length to your voiceover. Double-click the music clip, then go to Remix > Enable Remix. Drag the clip’s end to automatically fit the voice duration.

Step 4: Finalize and Master the Podcast Intro
After applying effects, give your full podcast intro a final polish. Head to Effects > Special > Mastering and select the Subtle Clarity preset. This enhances brightness and dynamics without over-processing.
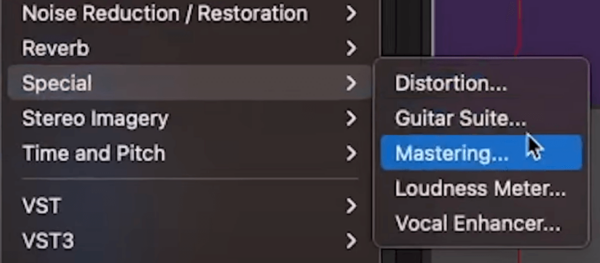
Once you’re satisfied, export the final version by going to File > Export > Multitrack Mixdown. Save it as an MP3 or WAV to use in your podcast episodes.
Bonus Tips for a Great Podcast Intro
- Keep your podcast intro under 30 seconds to maintain listener attention.
- Include your show name, tagline, and a clear hook.
- Match music and voice energy to your show’s vibe (e.g., energetic, calm, edgy).
- Consider a custom jingle or signature sound to make your intro stand out.
Need a Professional Podcast Intro?
If you’d rather leave it to the pros, we offer custom podcast intro creation with human voiceovers, sound design, and music tailored to your brand. Whether you’re launching your first episode or rebranding, we’ve got the perfect sound to make your podcast shine.
Further Reading
- How to Record and Edit a Podcast From Start to Finish
- Podcast Audio Mastering Tutorial
- Is Adobe Podcast the Future of Audio Editing?
- Create a Voice Over from Scratch in Adobe Audition


