DaVinci Resolve is one of the most used video editing software. But aside from that, it is also a versatile tool to record and edit audio. In this blog post, we’ll show you how to use DaVinci Resolve to record audio. Whether you’re a filmmaker, content creator, or someone looking to enhance their audio production, this step-by-step guide will help you.
Create a Timeline
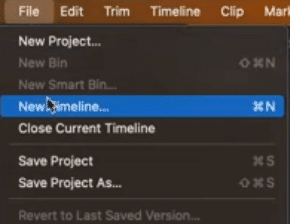
The first step to recording audio in DaVinci Resolve is to create a timeline. To do this, go to File > New Timeline or just press Cmd/Ctrl + N on your keyboard.
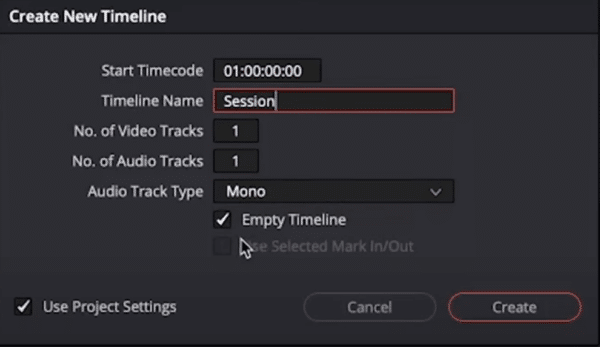
The timeline is where you’ll be organizing and editing your audio clips, so choose the settings that best suit your project, such as audio track type and number of tracks.
Select Audio Input
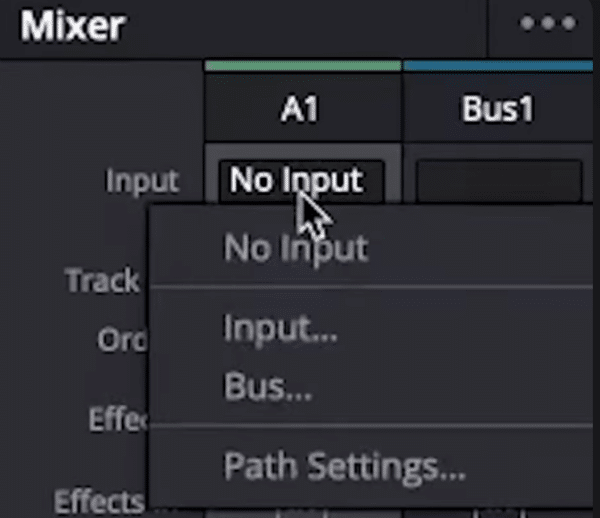
Now that your timeline is created, it’s time to choose the audio input source for your recording. DaVinci Resolve allows you to select your preferred audio source, whether it’s an external or a built-in microphone, or any other audio interface.
To do this, navigate to the Mixer tab on the right side of your window. Then choose the right audio input from the available options you have.
Start Recording
Once your audio input is selected, you are ready to start recording. In the Menu tab above your first audio track, locate the record button. It’s the Round icon beside the play and stop buttons.

Before hitting the record button, make sure your levels are appropriately set to have the best recording. When you’re ready, press the record button and start talking to your microphone.
To make sure it is indeed recording, you should see a moving red waveform on your audio track.

Save Project
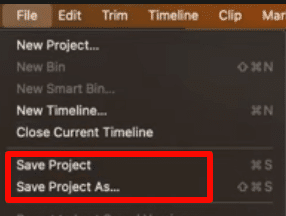
After you successfully record your audio, it’s important to save your project. This will ensure that you don’t lose any progress in case of unexpected technical problems and will enable you to make edits on the recording later.
To do this, navigate to the File menu and select Save Project. Choose a location on your computer to save the project file, and give it a name.
Export Audio File
Once you are done recording your project and you feel like it doesn’t need more editing, then it’s time to export it. To do this, go to the Deliver section of your timeline. Make sure to add a filename, select the right exporting location, and choose the right format.

One important thing to do here is to make sure you are only exporting the audio file. To do this, navigate to the video tab and untick the Export Video.

Final Thoughts
Recording audio using DaVinci Resolve is a straightforward process. It is important to note though that DaVinci was originally designed for video editing. And so, although you can record audio using this software, it still needs more features and improvements to make the recording process easier.
MRC: Your Voice, Perfected!
Want a voice that resonates with your brand? Look no further. At Music Radio Creative, we curate voiceovers that echo your vision. Click, choose, and charm!

