DaVinci Resolve is a versatile and powerful video editing software that is widely used by both amateur and professional editors. While it’s primarily known for its robust video editing capabilities, it also offers a comprehensive suite of audio editing tools. In this blog post, learn how to edit audio in DaVinci Resolve. We’ll focus on trimming audio, which is an essential process to remove unwanted sections of an audio track.
How To Trim the End of the Audio
Trimming the end of an audio track is essential for removing unwanted details at the end of your clip. It can also be used to match the desired duration of your project. Although it’s easy to trim clips, it can be confusing if you are new to DaVinci Resolve.
One of the usual ways to trim the end of an audio track is to drag the right edge of the clip. When you do this inside DaVinci, it might not let you trim the audio.
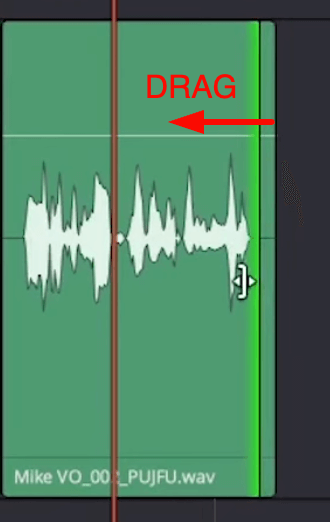
A simple way to solve this is to make sure that Snapping is turned off. To do this, click the Snapping tool icon at the top of your timeline. If it’s gray, that means it’s disabled.
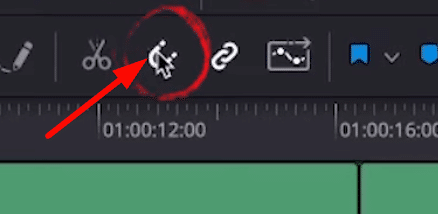
So to trim the end of a clip in DaVinci Resolve, first disable the Snapping tool. Then, hover your mouse cursor over the right edge of the video clip in the timeline. You’ll notice that the cursor changes to a double-headed arrow.
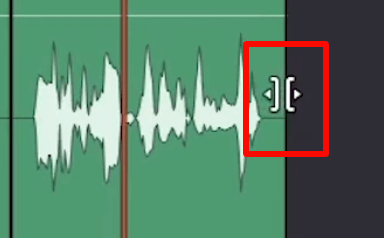
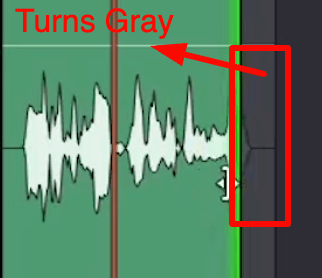
Click and drag the edge of the clip to trim it to your desired length. Trimming is working when you get a gray color on the trimmed part of the clip.
Use In and Out Markers to Trim
Another way to trim both ends of an audio is by using the In and Out markers.
To do this, move the playhead to the point where you want to start your edit and press “I” (in point) on your keyboard. Then, move the playhead to the point where you want to end your audio and press “O” (out point) on your keyboard.
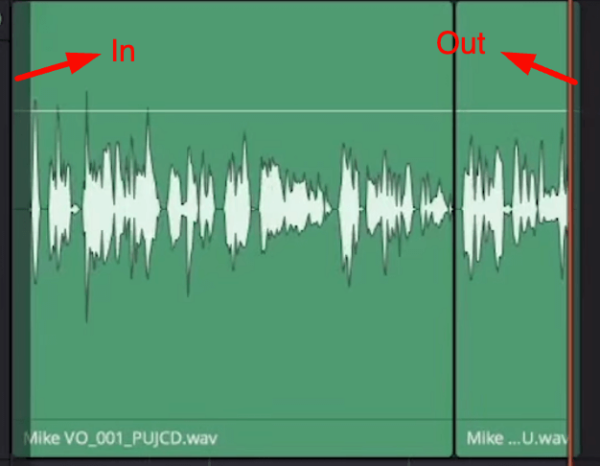
To make sure you added the in and out markers accurately, use the Zoom tool to take a closer look at the waveform. The zoom tools (both vertical and horizontal) are at the top menu of your timeline.

After adding the in and out points of your track, it’s time to trim. To do this, first, enable the snapping tool and then move your playhead to the start of your audio. When the cursor changes to an arrow, click and drag it until it snaps to your In-marker.
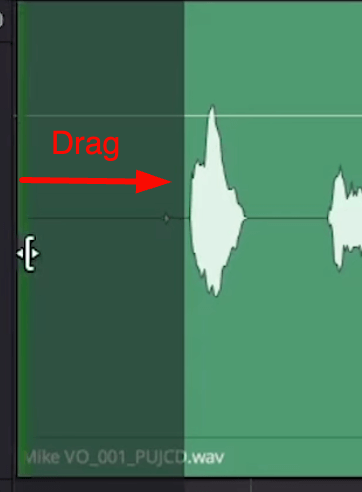
Do the same to the other end (out point) of your audio track.
How To Trim in Between Clips
There are instances when you have multiple audio clips on your timeline and you need to trim the space between them. This can be easily done in DaVinci Resolve.
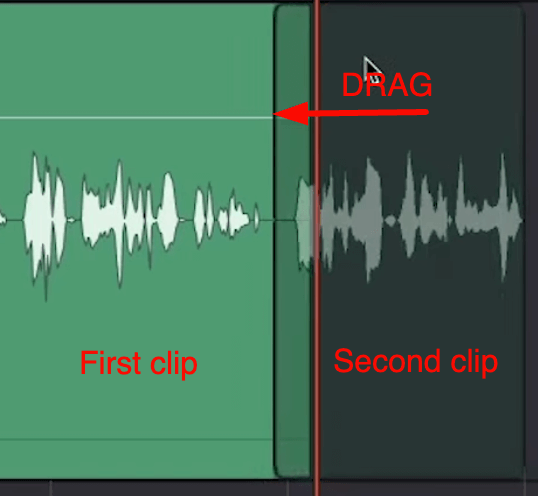
To do this, start by disabling the snapping tool. Then, hover your cursor over the area between the two clips until it changes to an arrow icon. Finally, click and drag to select the range you want to trim.
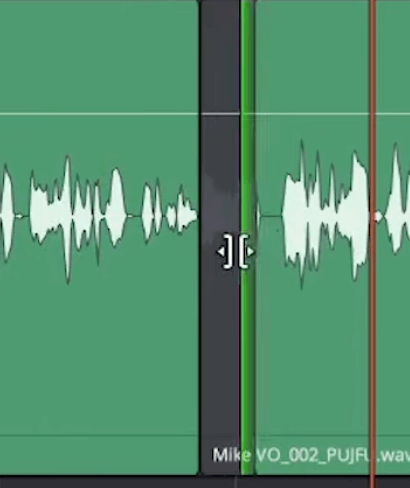
Another way you can do this is to select one audio clip and then drag it to the desired point.
If you prefer to watch a video tutorial, then click this YouTube link about How to Trim and Cut Audio in Davinci Resolve.
Final Thoughts
Trimming audio is an important editing process that every content creator and editor should learn. Whether you’re refining the timing of your clips or removing unwanted sections, understanding how to trim audio in DaVinci Resolve will significantly improve the overall quality of your projects.
Podcast Editing Services
Looking for top-notch audio and video editing? Music Radio Creative is your one-stop solution for professional podcast production. We ensure your content not only sounds amazing but also looks incredible. Discover our services today and take your podcast to new heights!


