Hello! In this blog, I’ll tell you how to fix clipped audio to its former glory in Adobe Audition in just a few simple steps.
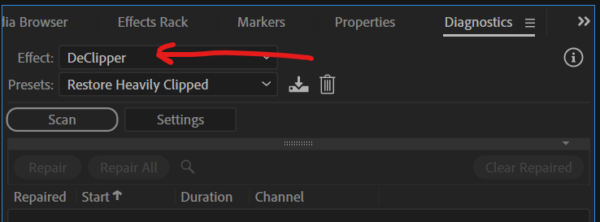
The first thing you’ll need to do once you’re in Audition is to open the diagnostics window. You do this by clicking on Window in the top menu. Next, select Diagnostics, and in that window choose the Effect called DeClipper.

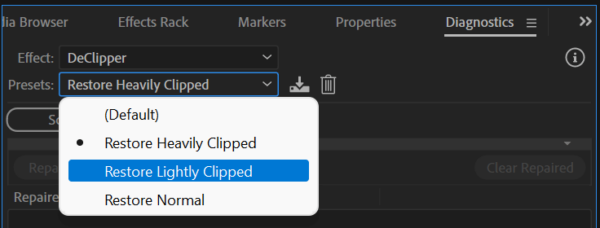
For Presets, select either Restore Heavily Clipped or Restore Lightly Clipped, depending on the extent of your clipping problems!
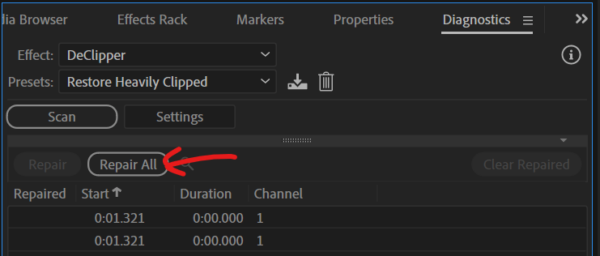
Then, click Scan. It will tell you the number of problems detected that it can fix, as well as list every single one.

Simply, all you then have to do is click ‘Repair All’ and you’ll see your clips clean up into a beautiful waveform. It will sound so much better.
So, remember, if you ever need to fix clipped audio, just follow those very simple steps. Within seconds (or minutes if there’s a lot to fix), you’ll have fully restored audio!

Learn More About Editing Audio In Adobe Audition
- Adobe Audition Multiband Compressor Tutorial
- Adobe Audition Autotune Tutorial – NO PLUGINS!
- How to Make Your Voice Sound Better in Multitrack
- Mike Murphy: Adobe Audition Shortcuts, Content Creation and Audio Gear
Download My Pro Podcast Presets
Talking about restoring audio, check out my Adobe Audition Pro Podcast Presets here! These presets can fix many problems, including background noise, AC hum, echo in your room, and many other problems that podcasters might come up against when recording.


