


The reason we recorded this podcast is because voice over artist Arthur Muhl asked me a question about how I cable everything together from my microphone to the computer. Also, recently Lawrence Daniels said that my expertise in recording studio equipment proved invaluable and wondered if I could do a detailed explanation on how to hook up all the appliances with the microphone and make it function with Adobe Audition.
Basic Microphone Set Up
I started with the microphone and explained a bit about how I run things. Basically, for voiceover I use the Audio Technica AT4033a Microphone*** and that has a microphone output which is a male XLR microphone output. So I need a cable that goes from female XLR to male XLR and plug it first into the back of the AT4033a. The mic cable goes into the mic input of the dbx 286s Microphone Preamp / Processor which is the very right hand input. That’s where I run my dbx 286S settings on the microphone to boost the bass, treble, enhancer, expander, and all those stuff that makes you sound really cool. I created a quick video about how I set my dbx 286s up.
***UPDATE*** Since recording this episode and tutorials I have now upgraded to NEUMANN TLM103 I could not have been happier with the switch and highly recommend this microphone to anyone who is taking their voice over career seriously. Audio Technica described above is a great mic for the mid range budget.

Should Voice Artists Add Effects?
Izabela pointed out that the majority of voiced audio are produced after being voiced dry. She posed the question on whether it is better to leave it to the producer to add any vocal effects after or for the artist to do it for themselves? I advised to use the dbx 286s to level out your voice, to compress it nicely but don’t over compress it. Izabela agreed and added that many voice artists apply compression but tend to overdo it. So if you really don’t know how to do it, don’t do it or better yet get an audio producer or audio engineer to do it. I also advised to bear in mind that, while I give away great secrets on how to make your voice sound better, it is not appropriate for every project and there are other ways of doing it as well.
dbx 286s Settings And Focusrite Sapphire Pro 14

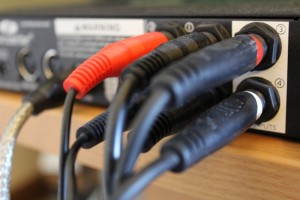
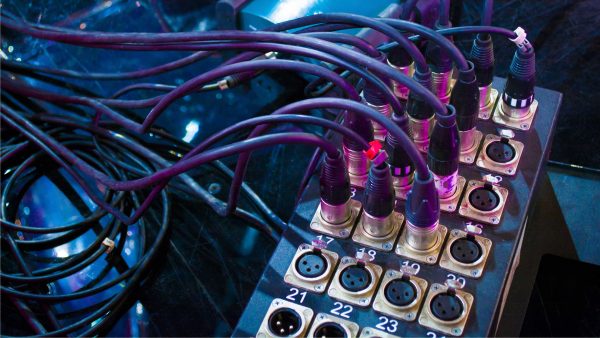
To set up the dbx 286s, the 6.5mm stereo jack goes into the back of the dbx 286s and splits into 2 mono jacks. To do this, a quality cable is essential because I then go into inputs 3 and 4 on the back of my Focusrite Sapphire Pro 14*** with 2 mono male 6.5mm jacks. I use inputs 3 and 4 because in this particular setup, 3 and 4 are for my Audio Technica 4033a and that goes into the back for voice overs but into inputs 1 and 2 which are XLR (or 6.5mm) inputs you can put other mics in there.
The Focusrite Sapphire Pro 14 then goes from firewire into firewire on the back of an iMac or a PC. However, the new iMac hasn’t got firewire anymore but it’s a Thunderbolt connector instead. Focusrite did say on their website that you can use thunderbolt but I think you need to buy some converter for it. There are also other great products which you can use like Focusrite Scarlett 2i2, which might be a little less advanced but it’s great for traveling voice artists and plugs in via USB.
***UPDATE*** Since we have recorded this episode the Focusrite Sapphire Pro 14 is no longer available for purchase. I now use and highly recommend Scarlett 2i2 instead.
Why Split The Mono Input Into 2 Inputs?
You may wonder of why I do things like that so I answered the question; why not just use input 3 or input 4 seeing that it’s a mono input. I explained that this is because some software will pick up both of those channels as one and you can’t select either one. But in adobe audition you can choose either input and use it as mono so if you like, once you plugged everything into 3 and 4 you can then select what you’d like in Adobe Audition preferences so you can select just channel 3 on both left and right.
About Sapphire Mix Control
Jon Buscall from the Online Marketing and Communications Podcast asked me about the Sapphire Mix Control which is software that you can install to operates your Focusrite audio interface, in this case the Focusrite Sapphire Pro 14. If you open up Sapphire Mix Control you can do many different things. Sometimes you want to record the output from your computer, or record your voice, there will be many different presets there and you can look for the Routing Presets section to do all this.
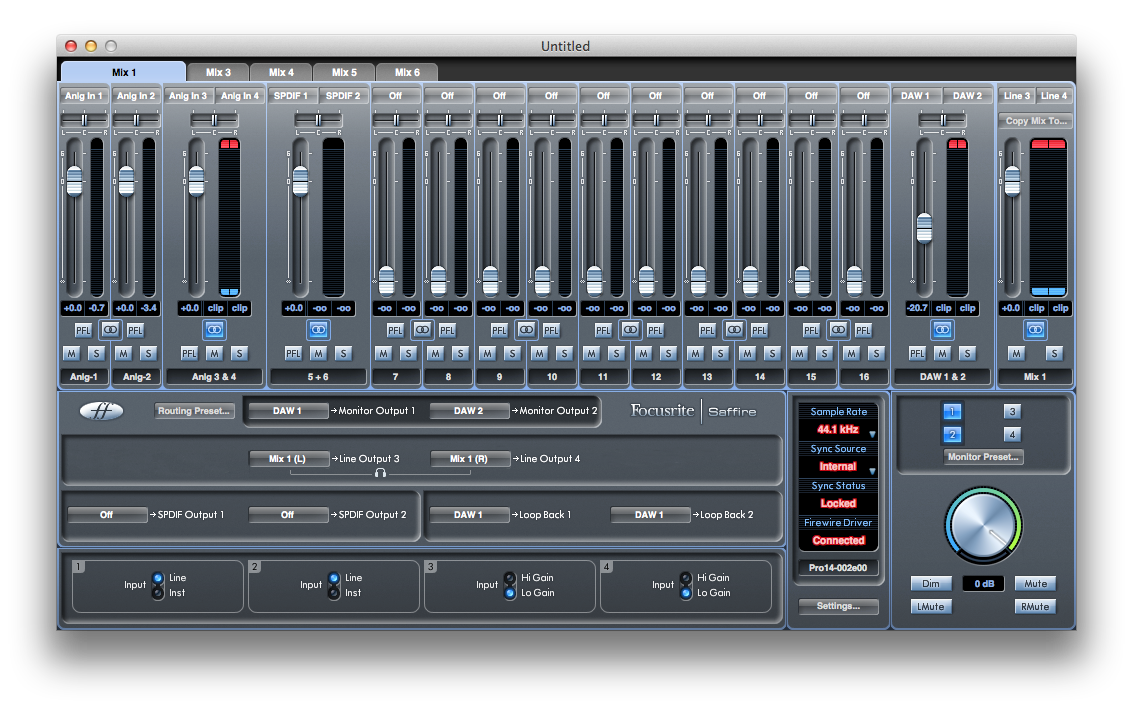
If you want to record from your computer, go to the loopback preset. If you then select loopback that puts all the computer audio and outputs to DAW only (or digital audio workstation). What you’ll want to do if you still want to monitor your audio, or change things around, is on the line output you use (3 and 4) switch them over to Mix 1 (L) and Mix 1 (R) instead of DAW 1 and DAW 2 and then you can listen to your outputs and inputs in real time.
Podcast Recording (Secret Surprise)
We plug our Heil PR40 microphones which we use exclusively for podcasting, not for voiceover because they are dynamic vs. condenser, direct into inputs 1 and 2 left and right on the Focusrite Sapphire Pro14 but not through the mic preamp and processor, we don’t actually use the dbx 286s to do this podcast because we have very little processing and we want the podcast to have a natural sound.
