In this blog, we’re going to look at how to make scary voices in Adobe Audition. This is a perfect step by step tutorial for those looking to spice up their productions for Halloween!
Getting Started – Scary Voice Effect 1
Once you’ve opened a new voiceover in Adobe Audition and recorded your audio, there are three things you can do to make your voice sound spooky.
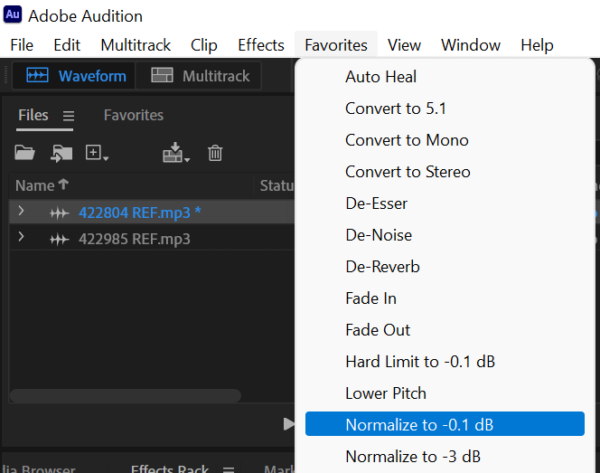
Before we get into that, though, we want to maximise the volume by normalising to either -0.1 or -3 dB and open it up in multitrack.
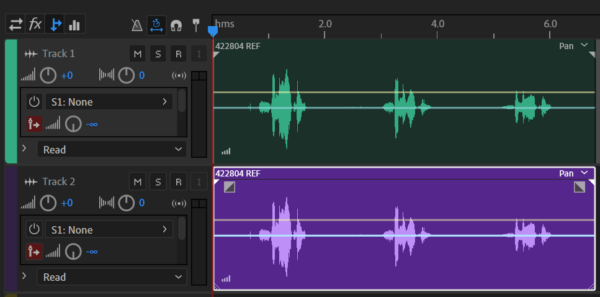
We then want to double-up the track by clicking ALT/OPTION and dragging it to the next track.
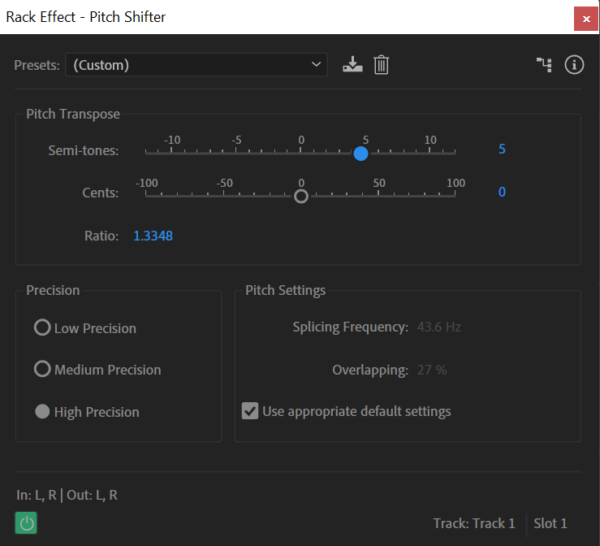
Then go to the Effects Rack and on the first track, go to Time and Pitch > Pitch Shifter and take it down by five semitones, and on the second track, this time take it up by five semitones.
You can play around with the values here until you get the effect that you’re after, as well as pan a bit to the left, pan to the right to make it sound even more imaged and sounding great.
Project Nightmare – Scary Voice Effect 2
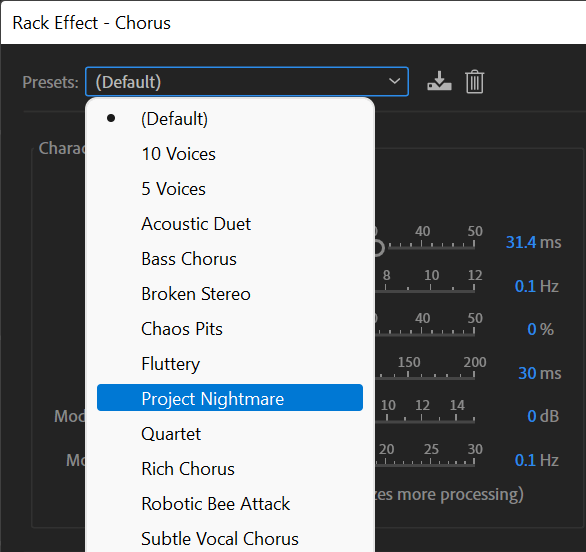
Starting where we left off, mute the second track, and then turn down the Pitch Shifter even more on track one. Then, go to Track Effects > Modulation > Chorus…
Then in the Rack Effects, have a play around with some of the presets – Project Nightmare and Bass Chorus, for example, are great ones.
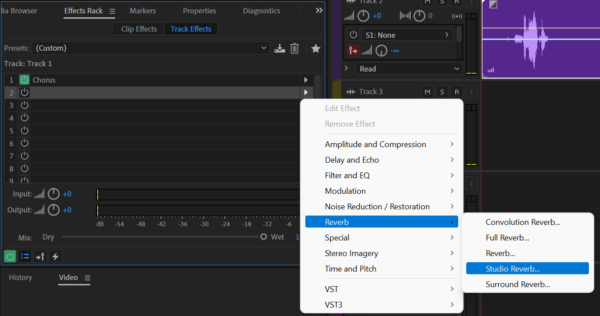
Finally, we can also go into Track Effects > Reverb > Studio Reverb…
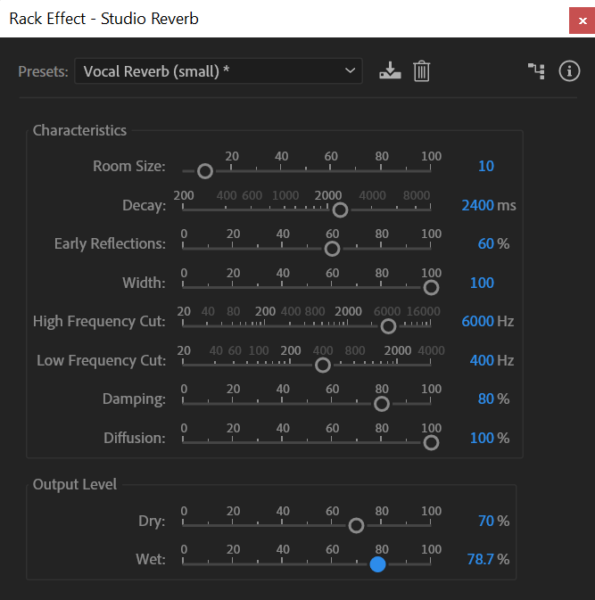
Usually starting off in Vocal Reverb (small) is quite good, putting the dry up to 100% and the wet up to 65% or so. If you want to make it even more scary, you can increase the Decay – the more you increase it, the bigger that reverb becomes.
Whispery Ghost – Scary Voice Effect 3
This one is great for a whispery ghost sound. Starting with the above effects already done, first take the reverb down a little.
Then, we want to do a little trick called reverse reverb. First, take a copy and paste it into a new audio file. Then, follow these steps:
- First, go to Edit > Insert > Silence… and set the duration to 10
- Then, place a marker so you know where you started
- The go to Effects > Reverse
- Then, Effects > Reverb > Studio Reverb…
- Add loads of decay, lots of wet, not very much dry, and click Apply
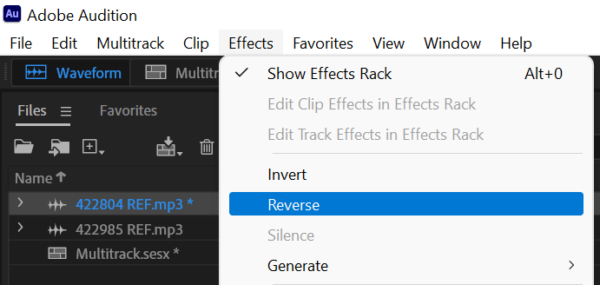
- Then, go to Effects > Reverse to reverse it back
- Then, bring it back into multitrack and match the marker up with the start of the voice sound
You can cut off the start, add some fade in and out, and there you have it – a very movie-like ghost voice – and there are three great ways to make spooky, scary voices in Adobe Audition!
Learn More About Editing Audio in Adobe Audition
- Adobe Audition Multiband Compressor Tutorial
- Adobe Audition Autotune Tutorial – NO PLUGINS!
- Saving Your Podcast in Adobe Audition
- Adobe Audition Tutorial: How to Make Your Voice Sound Better in Multitrack
Audio Production Course
Are you already producing audio? Great! Check out my course here, offering complete training for audio producers who are looking to take their audio production career seriously. The course is aimed at producers with basic existing Adobe Audition knowledge or more.

