DaVinci Resolve audio editing has a lot of features that can make audio sound epic. In this blog post, learn how to maximize your DaVinci Resolve audio editing techniques, focusing on the parametric equalizer and dynamics tool. I specifically show the settings and parameters I adjust to make a sample audio sound better using DaVinci Resolve audio editing techniques.
DaVinci Resolve Audio Editing Techniques
Whether you are new to DaVinci Resolve audio editing or an experienced user, understanding these techniques can significantly enhance your workflow.
Mastering DaVinci Resolve Audio Editing
Utilizing DaVinci Resolve audio editing can transform your sound with professional quality and enhance your DaVinci Resolve audio editing skills, making it easier to achieve the results you desire.
In DaVinci Resolve audio editing, mastering these tools will significantly enhance your projects and help you achieve a polished sound, showcasing the true power of DaVinci Resolve audio editing features.
One of my favorite aspects of DaVinci Resolve audio editing is its intuitive interface that allows you to easily access the features you need for effective audio enhancements in your DaVinci Resolve audio editing projects, making the editing process more enjoyable.
Before anything else, I want to share a helpful hack I use in DaVinci Resolve audio editing. It’s a simple way to ensure that the edits or changes you make to the project are in order. To do this, go to the Mixer tab on the right side of your workspace, and then under Order, choose FX EQ DY.
When it comes to DaVinci Resolve audio editing techniques, having a structured approach helps tremendously in achieving the desired audio quality.
Whether you’re a beginner or a pro, DaVinci Resolve audio editing offers tools to enhance your workflow.
By doing this, DaVinci will follow the “Effects > Equalization > Dynamics” order when making changes to the project. This means that any FX effects such as noise reduction will be done first before applying equalization and finally, any changes to the dynamics will come last.
How To Use Equalizer
Understanding DaVinci Resolve audio editing will take your projects to the next level.
I mention EQ often in my YouTube videos and blog posts because it is still one of the best tools for enhancing any audio project. This time, I wanted to make it more specific how I use the equalizer in my editing process.
But before that, if you are not familiar, an Equalizer is used to manipulate audio frequencies. You can use it to easily boost or cut certain frequencies of your audio projects.
By mastering DaVinci Resolve audio editing, you can ensure that your audio projects stand out with professional quality.
Step 1: Roll Off Low-end Frequencies
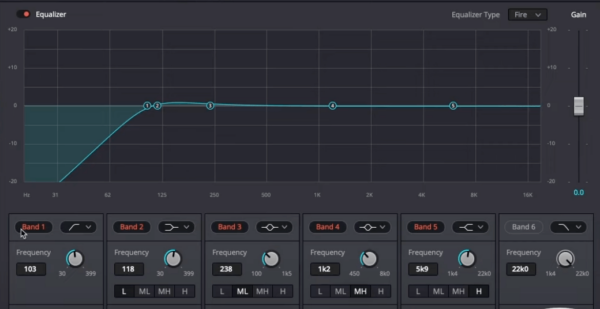
To start, I usually roll off the low-end frequencies. These frequencies are usually noises such as rumbles, airplane sounds, and street noises. Moreover, it includes any sound lower than 100Hz that is inaudible to the human ear. So the main goal is to eliminate those unuseful frequencies.
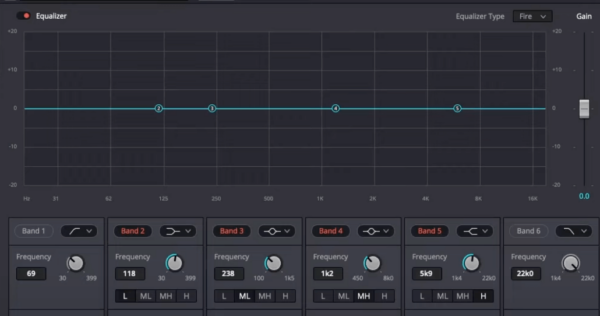
To do this in DaVinci, switch on Band 1 in the Equalizer tab. Then start to dial in until you hear it kick in. It’s usually around the 100Hz frequency. A good indication that it kicks in is when you hear that there’s not a huge change in the original voice but it actually rolls off the low-end bass.
Make sure to apply all the best practices in DaVinci Resolve audio editing to achieve optimal results.
Check the pictures below to see the before and after of a sample audio that I worked on.
Before
After

Step 2: Boost Other Frequencies
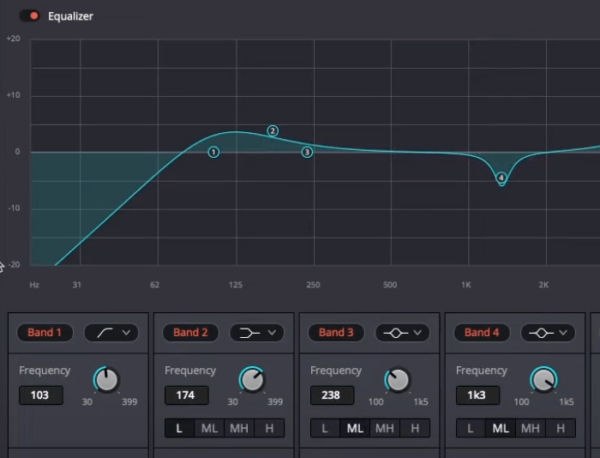
The next step is to boost the frequencies between 150-200Hz. Doing this will enhance the bass of our audio. To do this, just drag band 2 slightly upwards. Listen to the changes to the voice to make sure that you don’t overdo it.
You can also make changes to bands 3 and 4 if you want to. For example, you can make subtle changes to band 4 to get rid of some of those boxy mid-range frequencies.
Before
After
Your audio projects will benefit greatly from the tips shared in this DaVinci Resolve audio editing guide.
The dynamics compressor in DaVinci Resolve audio editing can drastically improve your audio quality.
Utilizing the dynamics compressor effectively is crucial in DaVinci Resolve audio editing.
Step 3: Enhance High-end Frequencies
Get familiar with the dynamics tools available in DaVinci Resolve audio editing for the best outcomes.
In DaVinci Resolve audio editing, the dynamics compressor is a game changer for audio clarity.
When utilizing DaVinci Resolve audio editing, ensure you’re making the most of the visual display for adjustments.
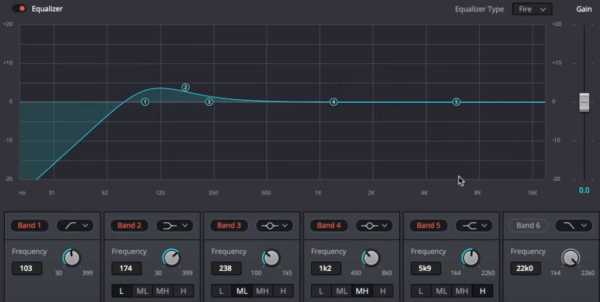
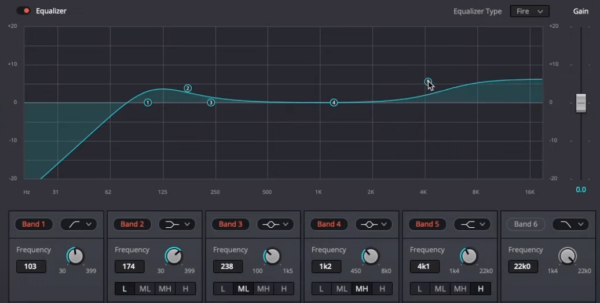
The final step is to enhance the high-end frequencies to make your audio sound crispier and clearer. To do this, increase the frequency and gain under band 5. Or you can just drag point 5 slightly upwards.
Before
With DaVinci Resolve audio editing, fine-tuning your audio is easier than ever.
Investing time in mastering DaVinci Resolve audio editing will pay off in the quality of your projects.
The right tools, like those in DaVinci Resolve audio editing, can elevate your audio production game.
After
Explore more on DaVinci Resolve audio editing for additional insights and techniques.
Before you move on to the next step, make sure to listen to the audio and make changes if necessary.
How To Use Dynamics Compressor
After adding EQ, it’s time to make sure that our voice stays at a consistent volume and free from audio clipping and distortion.
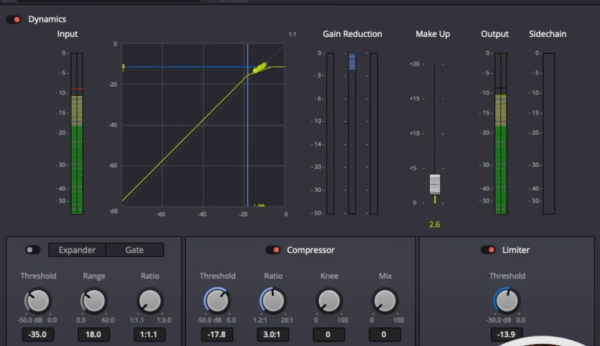
To do this, double-click on Dynamics in the mixer tab. Then switch on Compressor.
If you are not familiar, a compressor is used to reduce the dynamic range of a recording. This is done by making the loud parts quieter and the quiet segments louder.
Under the compressor, continue by adding the starting settings for the different parameters. Set the Threshold to -20, Ratio to 3:0:1, Attack to 0.70, and Release to 50. Do note that these settings can still be adjusted if necessary.
After that, listen to the audio while looking at the visual display on top. Those graphics help in identifying when something is wrong with the audio. For example, having a red audio spectrum that reaches 0dB means that the audio is being cut off. In this case, you’ll need to make further adjustments such as lowering the Limiter threshold and makeup gain.
Limiter is another tool inside the Dynamics tab. What it does is ensure that the audio will not exceed a certain threshold thus avoiding distortion. To use it, just switch it on and feel free to adjust the threshold and its other parameters.
Final Thoughts
Equalizer and Dynamics are two of the best audio tools to achieve polished and epic-sounding audio. These are found in almost all audio editing software including DaVinci Resolve. If you are an aspiring audio editor or a content creator, make time to understand and master these two tools.
For those looking for an easy solution to great audio (and no audio editing knowledge). My audio presets have the answer. With just one click you can make your audio sound better.
You can follow all of the above steps in my video (and hear audio samples too).
Further Reading
- Best DaVinci Resolve 19 Audio Features
- Audio Editing in DaVinci Resolve – A Step-by-Step Guide for Beginners
- How To Remove Vocals From Any Song Using DaVinci Resolve
- Best Settings For Exporting Audio and Video in DaVinci Resolve
- How to Edit Audio in DaVinci Resolve: Cut & Trim Step By Step
