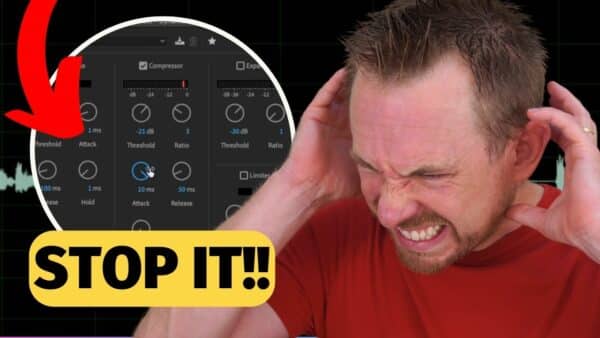
Audio compression is one of the most important effects to master in producing professional-sounding projects. In this blog post, let’s dive deep into the world of compression. I explain compression and all the elements of a successful compression process. In addition, I share my secret hack in making the most of this audio effect. This article is perfect for those who are editing podcasts, creating jingles, voiceovers, and any other audio/video content.
What is Compression?
Compression is an audio effect that is used to reduce the dynamic range of a recording. This is done by making the loud parts quieter and the quiet segments louder.
With a compressor, you can achieve a more consistent volume level throughout your audio mix. In addition, compression also adds more character to your recording making it sound polished.
Compression Settings Explained
To control the dynamic range of an audio mix, you need to understand the different compression settings. Each setting or parameter does a different task.
Threshold
First is the Threshold. This determines the volume level at which compression begins to take effect and is usually expressed as +/- dB. Any audio signal that exceeds this level will be compressed. So for example, if you set the threshold level at -21 dB, only signal peaks that extend above that level will be compressed.
Setting the threshold correctly is crucial to ensure that only the desired parts of the mix are affected. The ideal threshold setting depends on the sound input and what you are using compression for.
Ratio
The Ratio determines how much the audio signal is compressed once it exceeds the threshold. For example, a 2:1 ratio means that for every 2 dB above the threshold, the output will only increase by 1 dB. Higher ratios result in more aggressive compression while lower ratios have a more subtle effect.
A good ratio to start for vocals is either 2:1 or 3:1 to achieve a natural sound.
Attack
The Attack Time controls how quickly the compressor responds after the audio signal exceeds the threshold. A fast attack time can squash the life out of everything in your mix, while a slower attack time can let too much through before the compression kicks in. Most of the time, the default 1ms is pretty good for voiceovers.
Release
The Release Time is like the opposite of attack. It determines how quickly the compressor stops compressing after the audio signal falls below the threshold. A fast release time can make the compression more noticeable, while a slower release time results in smoother, more natural-sounding compression.
Ultimately, the goal is to find a good balance between the release and attack time.
Makeup Gain
Makeup Gain is used to compensate for the reduction in the overall volume caused by compression. After compressing the mix, the makeup gain boosts the entire audio signal to the desired level.
Common Compression Mistakes
Mistakes are inevitable in compressing audio mixes especially when you are just starting. Take note of the following common errors so that you can avoid them in your projects.
Overcompression
The most common compression mistake people make is overdoing it. Overcompression can be helpful if you want to achieve an aggressive-sounding mix. However, overly reducing the dynamic range of the audio might make it sound lifeless and unnatural. To avoid this, apply compression in moderation and make sure to keep track of the changes.
Ignoring The Context
It can be easy to just compress everything in isolation without considering the context of the audio. However, compression settings that work for one project may not be suitable for another. For example, compressing vocal recordings is different from compressing drums or other instruments.
Our Secret Hack
I want to share with you one of the hacks I do to easily set volume levels correctly. That is to use an amazing tool called Match Clip Loudness in Adobe Audition. What it does is get all your clips to the same perceived loudness.
To use this tool, Select all the waveforms in your Multitrack > Right Click > Match Clip Loudness. On the Match Clip Loudness tab, select the standard ITU and then set your target loudness. Once you press the OK button, Adobe Audition will automatically adjust the loudness of your audio mix to a specified target level.
Final Thoughts
Audio compression is a powerful tool that can greatly enhance the quality of your recordings when used properly. Understanding the different parameters and avoiding common mistakes are the key to maximizing compression. Remember, the goal of compression is to enhance the audio without making the processing noticeable.
EQ & Compression Giving You a Headache?
You are not alone! As a result of many emails I have developed some of the industry’s best regarded presets for most of audio editors – Adobe Audition, Audacity, Premiere Pro and DaVinci Resolve included. If you would like to have a great sound in just one click. Check them out!
